YouTube has become an invaluable resource for photographers looking to improve their skills and learn new techniques. In this section, I will explore the best YouTube channels that offer comprehensive photography tutorials, covering camera settings for YouTube videos and lighting techniques for photography tutorials. These tutorials are designed to help you master your camera skills and elevate your photography prowess.
Whether you’re a beginner or an experienced photographer, these tutorials provide valuable insights and practical tips to enhance your photography. From understanding camera settings for YouTube videos to mastering lighting techniques, these tutorials will empower you to create professional-quality images and captivating tutorial videos.

Best YouTube Photography Tutorials
When it comes to photography tutorials, YouTube serves as a goldmine of knowledge and inspiration. With countless channels dedicated to teaching the art of photography, it can be overwhelming to find the best ones. To help you navigate through the vast sea of content, I have curated a list of the top YouTube tutorial channels that are a must-watch for photography enthusiasts.
1. PHLEARN: With over 2.44 million subscribers, PHLEARN offers an extensive library of photography tutorials. From beginner-friendly content to advanced techniques, this channel covers a wide range of topics such as photo editing, retouching, and composition. The step-by-step approach of their tutorials makes it easy for viewers to follow along and implement the techniques in their own work.
2. PiXimperfect: With over 1.82 million subscribers, PiXimperfect is a go-to channel for learning advanced editing techniques. Unmesh Dinda, the host of the channel, breaks down complex editing processes into simple and easy-to-understand steps. Whether you want to learn how to create stunning composites or master retouching, PiXimperfect has got you covered.
Top YouTube Photography Tutorial Channels
| Channel | Subscribers |
|---|---|
| PHLEARN | 2.44 million |
| PiXimperfect | 1.82 million |
3. The Photoshop Training Channel: As the name suggests, this channel focuses primarily on teaching Photoshop techniques for photographers. With over 508k subscribers, the channel covers a wide range of topics, including photo editing, retouching, and manipulation. Whether you are a beginner or an advanced user, you will find valuable tips and tricks to enhance your Photoshop skills.
4. Mango Street: Known for its visually stunning content, Mango Street provides photography tutorials that are both informative and aesthetically pleasing. With over 1.72 million subscribers, Rachel and Daniel, the hosts of the channel, share their expertise on various topics, including composition, lighting, and storytelling. Their engaging and cinematic style of videography makes learning a delightful experience.

These YouTube tutorial channels offer a wealth of knowledge and inspiration for photographers of all levels. Whether you are looking to improve your editing skills, learn new techniques, or gain insights into the art of photography, these channels are a treasure trove of valuable content. Dive into their tutorials, practice your skills, and watch your photography soar to new heights.
Learn Camera Settings for YouTube Videos
When it comes to creating high-quality YouTube videos, having the right camera settings is essential. Whether you’re shooting vlogs, tutorials, or other types of content, understanding how to optimize your camera settings can significantly impact the quality of your videos. In this section, I will explore the key camera settings for YouTube videos, including shooting in manual mode, DSLR photography tips, and techniques for achieving professional-looking videos.
Shooting in Manual Mode for YouTube Tutorials
Shooting in manual mode gives you full control over your camera settings, allowing you to customize the exposure, focus, and other important parameters. This level of control is crucial for achieving consistent and high-quality footage for your YouTube tutorials. By shooting in manual mode, you can adjust the aperture, shutter speed, and ISO to suit the lighting conditions and create the desired visual effects. Additionally, shooting in manual mode ensures that your videos have a consistent exposure level throughout, resulting in a more professional and polished look.
DSLR Photography Tips for YouTube Videos
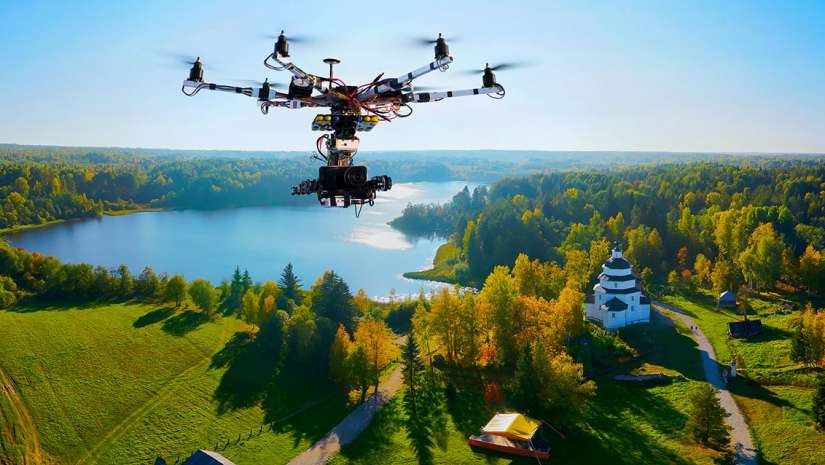
If you’re using a DSLR camera for your YouTube videos, there are several tips that can help you optimize the image quality. Firstly, make sure to choose the appropriate lens for your shooting style and subject matter. Wide-angle lenses are great for capturing landscapes or showcasing your surroundings, while telephoto lenses are ideal for portraits or detailed shots. Secondly, consider using a tripod to stabilize your camera and minimize any shaky footage. This is especially important when shooting tutorials that require steady and smooth camera movements. Lastly, don’t forget to clean your camera sensor regularly to avoid dust spots or smudges that could affect the overall image quality.
By implementing these camera settings and tips, you will be able to create visually appealing YouTube videos that captivate your audience and showcase your photography skills. Experiment with different settings, techniques, and camera gear to find the optimal configuration for your unique style and content. Remember, practice makes perfect, so don’t be afraid to try new things and learn from your experiences.
| Camera Setting | Description |
|---|---|
| Aperture | The aperture determines the depth of field, controlling how much of the image is in focus. A wider aperture (lower f-stop value) creates a shallow depth of field, blurring the background and emphasizing the subject. |
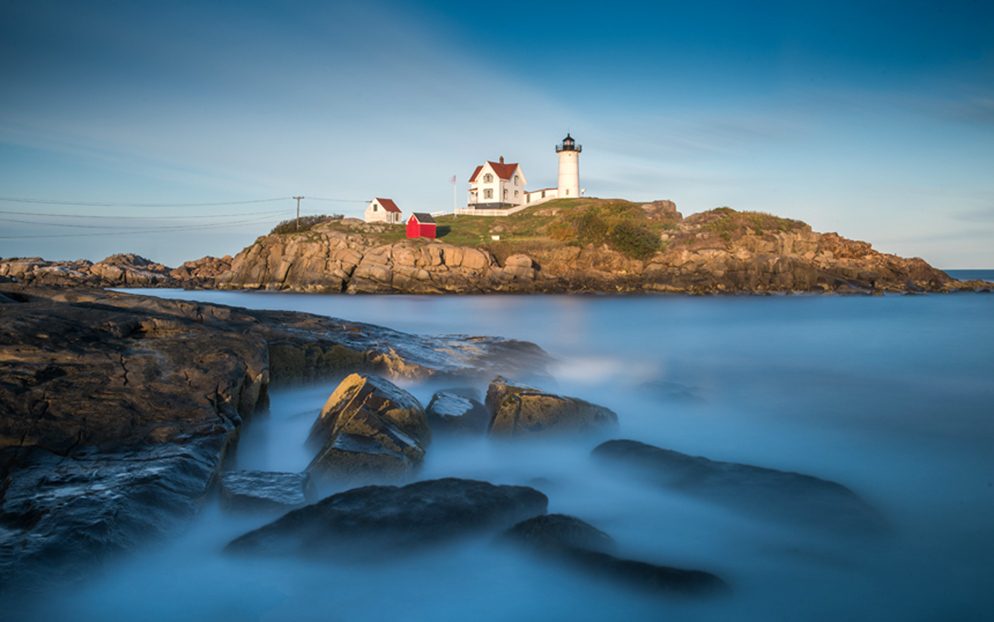
| Shutter Speed | The shutter speed controls the duration of the exposure, affecting how motion is captured in the video. Faster shutter speeds freeze the action, while slower shutter speeds create motion blur. |
| ISO | The ISO setting determines the sensitivity of the camera’s image sensor to light. Lower ISO values result in less noise but require more light, while higher ISO values increase sensitivity but may introduce graininess to the footage. |
| White Balance | White balance adjusts the color temperature of the video to accurately represent the colors in the scene. It ensures that white objects appear white and that the overall color balance is correct. |
| Exposure Compensation | Exposure compensation allows you to adjust the overall exposure of the video, compensating for overly bright or dark scenes. It helps to avoid overexposure or underexposure and maintain optimal brightness. |
Lighting Techniques for Photography Tutorials
Lighting is a fundamental aspect of photography that greatly impacts the outcome of tutorial videos. By understanding and implementing various lighting techniques, you can enhance the quality and visual appeal of your photography tutorials. In this section, we will explore different lighting methods that are commonly used in photography tutorials, including natural light, artificial lighting, and smartphone photography tips.
Natural Light
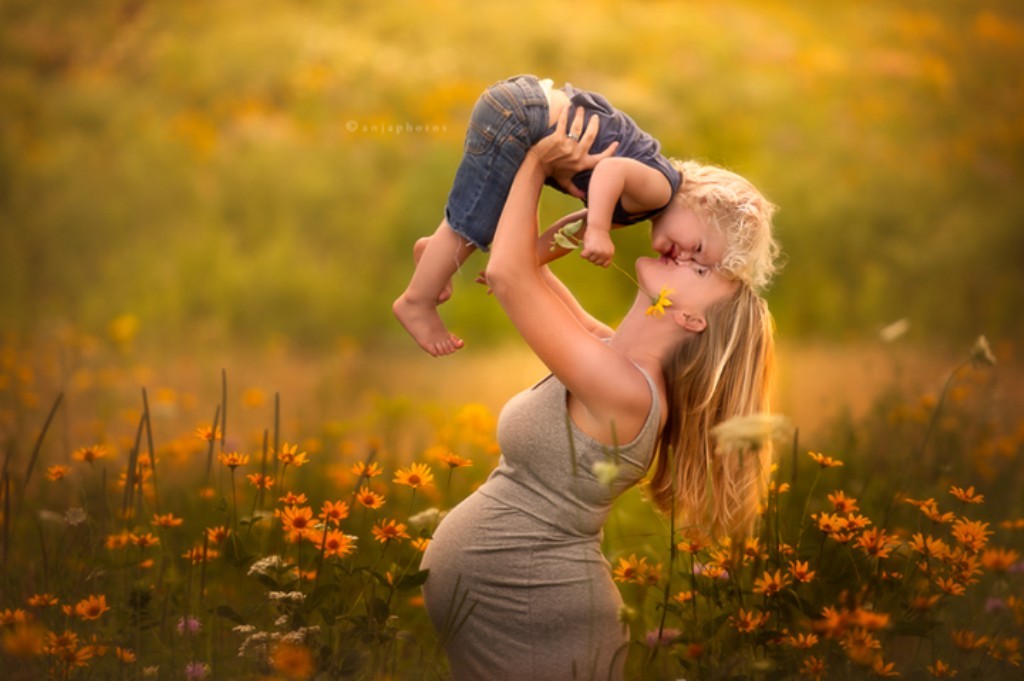
Natural light is one of the most accessible and versatile lighting sources for photography tutorials. It can create a soft and flattering illumination that beautifully highlights the subject. When shooting outdoors, utilize the golden hours, which are the hour after sunrise and the hour before sunset, for warm and golden tones. Avoid harsh midday sunlight, as it can create unflattering shadows. Experiment with different angles and positions in relation to the light source to achieve the desired effect.
Artificial Lighting
Artificial lighting is commonly used in indoor photography tutorials, where controlling the light becomes essential. Studio lights, such as strobes or continuous lights, provide consistent and customizable illumination. Use softboxes, umbrellas, or diffusers to soften the light and reduce harsh shadows. Additionally, consider using reflectors or bounce boards to redirect and manipulate light. Experiment with different lighting setups to achieve the desired mood and effect for your tutorials.
Smartphone Photography Tips
With the advancement of smartphone technology, capturing high-quality images and videos for tutorials has become more accessible than ever. When shooting with a smartphone, make use of the available light sources, such as natural light or indoor lighting. Avoid using the phone’s built-in flash, as it can create harsh and unnatural lighting. Instead, try using third-party smartphone lighting accessories, such as clip-on LED lights or portable ring lights, to enhance the lighting in your tutorial videos. Experiment with different lighting techniques to find the most suitable and visually appealing approach for your smartphone photography tutorials.
By incorporating these lighting techniques into your photography tutorials, you can create visually stunning and engaging content that effectively conveys your message and captures the attention of your audience.

Composition Tips for YouTube Tutorials
When creating tutorial videos for YouTube, composition is a key aspect that can greatly enhance the visual appeal and effectiveness of your content. Composition refers to how elements are arranged within the frame of your video, and it plays a crucial role in capturing the viewer’s attention and conveying your message effectively. In this section, I will share some composition tips for YouTube tutorials that will help you create engaging and visually pleasing videos.
1. Rule of Thirds: The rule of thirds is a fundamental principle in photography and videography. It involves dividing the frame into nine equal sections using two horizontal and two vertical lines. By placing your subject or key elements along these lines or at the intersections, you can create a visually balanced and interesting composition.
2. Leading Lines: Leading lines are lines within your frame that guide the viewer’s eye towards the subject or focal point of your video. These lines can be actual lines such as roads or paths, or they can be implied lines created by elements in the scene. Utilizing leading lines can add depth and visual interest to your videos.
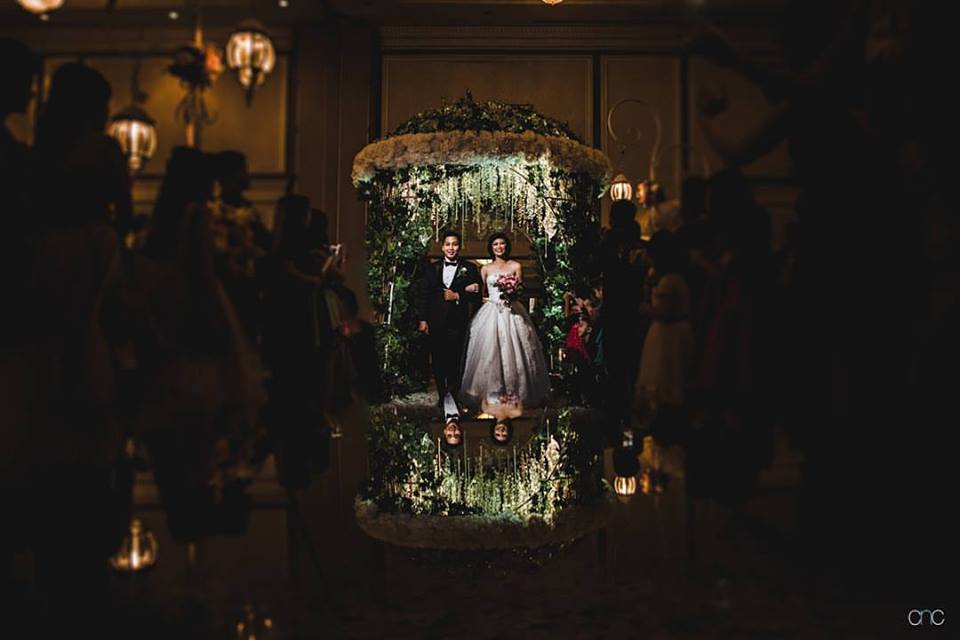
3. Framing: Framing involves using objects or elements within the scene to frame your subject. This technique can draw attention to the subject and create a sense of context and depth. Experiment with natural frames such as archways, windows, or trees, or use objects within your environment to create interesting framing elements.
Composition Techniques
| Technique | Description |
|---|---|
| Rule of Thirds | Divide your frame into nine equal sections and place your subject along the lines or intersections for a balanced composition. |
| Leading Lines | Use lines within your frame to guide the viewer’s eye towards the subject or focal point. |
| Framing | Employ objects or elements within the scene to frame your subject and add depth and context. |
By applying these composition techniques in your YouTube tutorials, you can create visually appealing and engaging videos that effectively convey your message. Remember to experiment and have fun with composition, as it can greatly enhance the overall quality of your tutorial content.
Editing Software for YouTube Photography Tutorials
When it comes to creating captivating and professional YouTube photography tutorials, having the right editing software can make all the difference. In this section, we will explore some of the top editing software options that will help you enhance your tutorial videos and showcase your photography skills.
Adobe Lightroom
Adobe Lightroom is a popular choice among photographers for its robust editing capabilities and user-friendly interface. With Lightroom, you can easily organize and edit your photos, apply presets, adjust exposure and white balance, and fine-tune colors. It also offers powerful features like non-destructive editing and batch processing, making it a valuable tool for editing multiple images efficiently.
Photoshop
Adobe Photoshop is a versatile editing software that provides photographers with endless possibilities for creating stunning imagery. With Photoshop, you can retouch photos, remove unwanted objects, and apply sophisticated adjustments and effects. It also offers advanced features like layers and masks, allowing for precise control over every aspect of your image.
GIMP
GIMP, which stands for GNU Image Manipulation Program, is a free and open-source editing software that provides users with a wide range of editing tools and features. While it may not have all the bells and whistles of commercial software, GIMP is a powerful alternative that can help you achieve professional-looking results. It offers tools for image retouching, color correction, and photo manipulation, making it a great option for photographers on a budget.
Whether you choose Adobe Lightroom, Photoshop, or GIMP, having a reliable editing software is essential for creating polished and visually appealing YouTube photography tutorials. Each of these programs offers unique features and capabilities, so it’s worth exploring and experimenting to find the one that best suits your needs and style.

| Feature | Adobe Lightroom | Photoshop | GIMP |
|---|---|---|---|
| Organize and manage photos | ✔️ | ✔️ | ✔️ |
| Non-destructive editing | ✔️ | ✔️ | – |
| Batch processing | ✔️ | ✔️ | – |
| Advanced retouching | – | ✔️ | ✔️ |
| Layers and masks | – | ✔️ | ✔️ |
| Free and open-source | – | – | ✔️ |
Conclusion
Throughout this article, I have discussed the importance of YouTube as a platform for photographers to enhance their skills and learn new techniques. Whether you are a beginner or an experienced photographer, there are valuable resources available on YouTube to help you improve your photography prowess.
By following the advice and techniques presented in beginner photography tutorials, you can develop a solid foundation of photography techniques. These tutorials cover a range of topics, including camera settings, lighting techniques, composition tips, and editing software.
Moreover, YouTube is home to a variety of photography tutorial channels that cater to different levels of expertise. Whether you are just starting out or looking to refine your techniques, these channels offer a wealth of knowledge and inspiration.
So, if you’re looking to expand your photography skills and techniques, I highly recommend exploring the photography tutorial channels on YouTube. With their guidance and your dedication, you can elevate your photography to new heights and create stunning images to share with the world. Happy shooting!
FAQ
Are these YouTube photography tutorials suitable for all levels of photographers?
Yes, these tutorials cater to both beginners and experienced photographers, offering valuable resources for all skill levels.
What topics do these YouTube photography tutorials cover?
These tutorials cover a wide range of topics, including photo editing, composition, camera settings, lighting techniques, and more.
Which YouTube channels are recommended for photography tutorials?
Some recommended YouTube channels include PHLEARN, PiXimperfect, The Photoshop Training Channel, and Mango Street.
Can I learn about camera settings for YouTube videos from these tutorials?
Absolutely, these tutorials provide insights into shooting in manual mode, DSLR photography tips, and techniques for achieving professional-looking videos.
How can I improve the lighting in my photography tutorials?
The tutorials explore various lighting techniques, including natural light, artificial lighting, and smartphone photography tips.
What composition tips are covered in the YouTube tutorials?
The tutorials discuss composition techniques such as the rule of thirds, leading lines, and framing to help you create visually appealing tutorial videos.
Which editing software is recommended for YouTube photography tutorials?
Adobe Lightroom, Photoshop, and GIMP are among the recommended editing software programs covered in these tutorials.