Welcome to an exciting journey into the world of freelensing photography! My name is [Your Name], and I’ve been passionate about photography for over a decade. Throughout my career, I’ve explored various techniques and genres, but freelensing has always held a special place in my heart.
Before we dive into the top 20 freelensing photography techniques specifically tailored for beginners in 2024, let me share a story that sparked my love for this unique artistic expression.
A few years ago, I was walking through a picturesque garden, camera in hand, trying to capture the beauty of nature. As I reached for my trusty lens, I noticed a group of butterflies fluttering gracefully around a bed of colorful flowers.
Excited to capture their delicate beauty, I focused my lens, but I couldn’t quite capture the ethereal essence of their presence. Disappointed, I decided to try something different. I detached the lens from the camera, held it close, and angled it towards the butterflies.
What happened next was magical. As I gently moved the lens, the focus shifted, creating a dreamy and whimsical effect. The resulting images portrayed the butterflies in a whole new light, surrounded by a blurred and almost mystical background.
That experience opened my eyes to the world of freelensing photography. It taught me that sometimes, breaking the rules and embracing a touch of unpredictability can lead to the most breathtaking and unique images.
Now, I want to share that enchantment with you. In this comprehensive guide, I will walk you through the top 20 freelensing photography techniques for beginners in 2024. Whether you’re just starting out or looking to expand your skills, these techniques will enable you to create stunning and artistic images that capture the essence of your subject.
Key Takeaways:
- Freelensing photography offers a unique and artistic approach to capturing images
- Detaching the lens from the camera and angling it can create dreamy, ethereal effects
- Embracing freelensing allows for unpredictability and breathtaking results
- This guide will provide the top 20 freelensing photography techniques for beginners in 2024
- These techniques will enhance your skills and enable you to capture stunning images
What is Freelensing Photography?

In this section, we will delve into the essence of freelensing photography and explore its definition, concept, differences from traditional photography techniques, and the creative possibilities it offers.
Definition and Concept of Freelensing
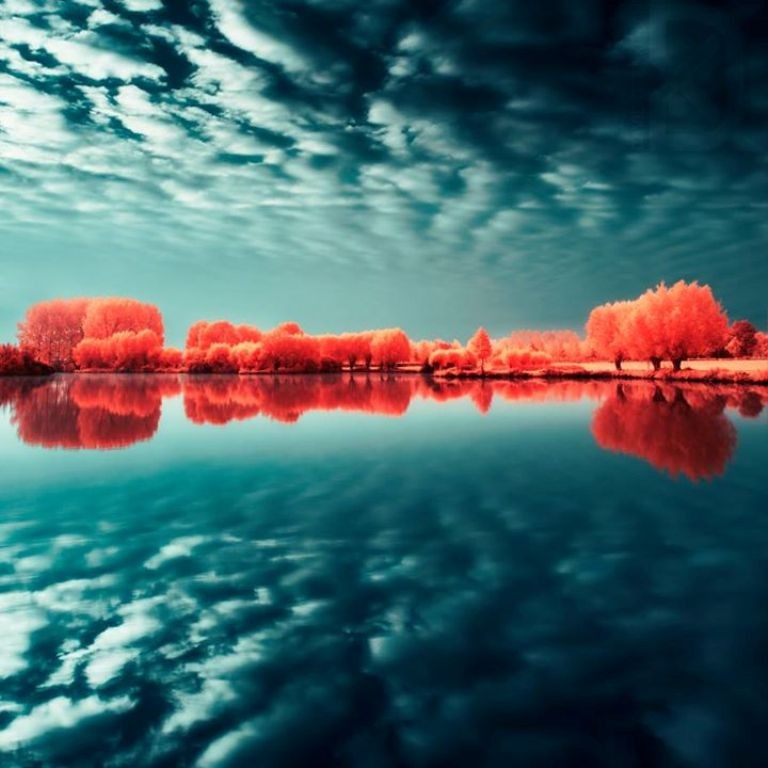
Freelensing is an experimental photography technique that involves detaching the lens from the camera body and holding it manually in front of the sensor. This unconventional approach creates a tilt-shift effect, allowing photographers to control the plane of focus and depth of field in unique and creative ways.
Freelensing takes advantage of the fact that most lenses are not permanently fixed to the camera body. By manually manipulating the lens, photographers can introduce intentional blur, light leaks, and bokeh effects, resulting in dreamy and ethereal images that evoke a sense of artistic expression.
How Freelensing Differs from Traditional Photography
Freelensing differs from traditional photography techniques in several ways. While traditional photography relies on a securely attached lens that communicates with the camera body to ensure accurate exposure and focus, freelensing disrupts this connection. By disconnecting the lens, photographers have greater control over the artistic interpretation of the image, introducing a level of unpredictability and experimentation.
Unlike traditional photography, freelensing allows for manual manipulation of the lens’s position, angle, and distance from the sensor. This hands-on approach opens up new creative opportunities, enabling photographers to craft images with unique perspectives, selective focus, and distinctive bokeh effects that are difficult to achieve through traditional methods.
The Creative Possibilities of Freelensing Photography
Freelensing photography opens up a world of creative possibilities for photographers. By introducing intentional blur, light leaks, and bokeh effects, freelensing adds a touch of magic and artistry to images. This technique allows photographers to create images with a dream-like quality, adding a sense of emotion and fantasy to their work.
Some creative possibilities of freelensing photography include:
1. Unique Bokeh Effects: By manipulating the lens’s position and angle, photographers can create bokeh (out-of-focus) areas with customized shapes and patterns, adding visual interest and enhancing the overall composition of the image.
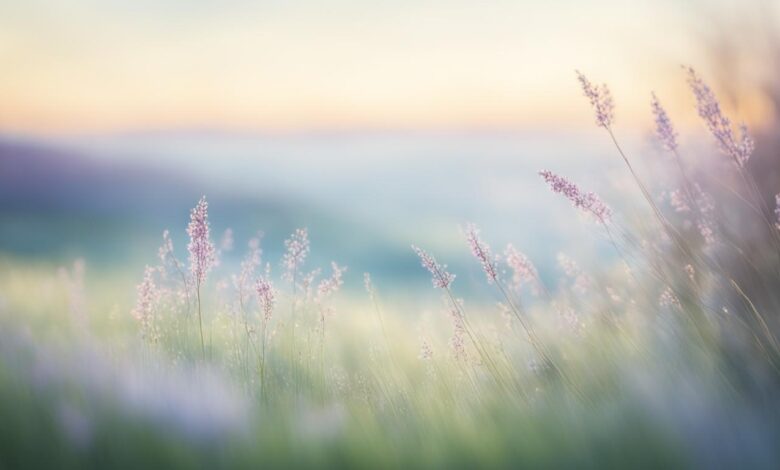
2. Ethereal and Dreamy Images: Freelensing can create soft and dreamy images with a shallow depth of field, resulting in a romantic, otherworldly aesthetic.
3. Selective Focus: With freelensing, photographers can control the area of sharpness within the image, drawing attention to specific subjects or details while blurring the surrounding elements.
4. Intentional Blur: By purposefully introducing blur in certain areas of the image, freelensing allows photographers to create abstract and artistic interpretations, emphasizing mood and emotion.
5. Light Leaks: Freelensing can create light leaks, which are unintentional exposures to light that leak into the camera body, resulting in creative and unpredictable effects that add a vintage, nostalgic feel to images.
Freelensing photography offers photographers a platform to experiment, take risks, and push the boundaries of traditional photography. The freedom to manipulate the lens opens up a whole new world of artistic expression, allowing photographers to create truly unique and captivating images.
Essential Equipment for Freelensing Photography

To embark on your freelensing journey, it is crucial to have the right equipment. This section will guide you through the process of selecting the ideal camera for freelensing, lens selection options, adapting vintage lenses, and exploring accessories that can enhance your freelensing experience.
Choosing the Right Camera for Freelensing
When choosing a camera for freelensing, there are several factors to consider:
- The sensor size: A larger sensor can provide better image quality and low-light performance.
- Mirrorless vs. DSLR: Mirrorless cameras tend to be more lightweight and compact, making them easier to handle when freelensing.
- Image stabilization: Look for a camera with built-in image stabilization to compensate for any potential camera shake that freelensing may introduce.
Considering these factors will help you find a camera that suits your specific needs and preferences for freelensing.
Lens Selection for Freelensing: Prime vs. Zoom Lenses
When it comes to lens selection in freelensing, you have two main options:
- Prime lenses: These lenses have a fixed focal length, offering superior image quality and wider maximum apertures, which can help create beautiful bokeh effects in your freelensed images.
- Zoom lenses: These lenses offer versatility with their adjustable focal lengths. While they may not provide the same wide maximum apertures as prime lenses, they can still be used effectively for freelensing.
Both prime and zoom lenses can be used for freelensing, so choose the option that aligns best with your shooting style and creative goals.
Adapting Vintage and Manual Focus Lenses for Freelensing
One of the unique aspects of freelensing is the ability to adapt vintage and manual focus lenses to your camera. This opens up a world of possibilities, allowing you to experiment with different optical characteristics and aesthetics.
When adapting vintage and manual focus lenses for freelensing, consider the following:
- Choose lenses with a wide maximum aperture for better bokeh effects.
- Ensure the lens mount is compatible with your camera body.
- Focus manually and experiment with different tilt angles to achieve unique and artistic results.
Accessories to Enhance Your Freelensing Experience
There are several accessories available that can enhance your freelensing experience. These include:
- Lens mounts and adapters: These allow you to attach various lenses to your camera.
- Lens hoods: These can help reduce lens flare and protect your lens from stray light.
- Filters: Filters can be used to add creative effects or adjust the light entering the lens.
Consider adding these accessories to your freelensing kit to further explore the artistic possibilities of this technique.
Comparison of Camera Types for Freelensing
| Camera Type | Advantages | Considerations |
|---|---|---|
| Mirrorless | Compact and lightweight | May have fewer lens options |
| DSLR | Wide range of lens options | Heavier and bulkier |
Getting Started with Freelensing Photography

Freelensing photography is a unique technique that allows you to create artistic and dream-like images with a tilt-shift effect. To dive into the world of freelensing, it’s important to start by understanding the essential techniques and settings. In this section, I will guide you through the key steps to get started with freelensing photography.
Setting Up Your Camera for Freelensing
Before you begin freelensing, it’s crucial to adjust your camera settings to ensure optimal results. Here are a few steps to follow:
- Switch your camera to manual mode to have full control over the exposure settings.
- Set your lens to manual focus mode.
- Disable any image stabilization or autofocus features, as they can interfere with freelensing.
- Ensure your lens aperture is wide open, allowing for more light to enter the camera and creating a shallow depth of field.
By setting up your camera in this way, you’ll have greater control over the freelensing effect and achieve the desired artistic look.
Mastering the Art of Holding and Tilting the Lens
One of the key techniques in freelensing is holding and tilting the lens to control the focus plane and create unique blur effects. Here are some tips to help you master this technique:
- Hold the lens slightly away from the camera body to create a gap through which light can leak into the sensor.
- Experiment with tilting the lens in different directions to adjust the plane of focus and blur.
- Use small movements to fine-tune the focus and achieve the desired effect.
With practice, you’ll develop a sense of how different lens movements and angles can create stunning and ethereal images.
Focusing Techniques for Freelensing Photography
Focusing in freelensing requires a different approach compared to traditional photography. Here are a few focusing techniques to explore:
- Focus manually by rotating the lens focus ring and adjusting it until your subject appears sharp in the viewfinder or on the camera’s LCD screen.
- Experiment with selective focus by intentionally blurring certain areas while keeping a specific subject in focus.
- Take advantage of the shallow depth of field to draw attention to specific details or create a sense of depth and dimension.
Remember to take your time and experiment with different focusing techniques to achieve the desired visual impact in your freelensing photography.
Controlling Aperture and Depth of Field in Freelensing
Controlling the aperture in freelensing allows you to adjust the depth of field and create different visual effects. Here are a few tips:
- Utilize a wide aperture, such as f/2.8 or wider, to achieve a shallow depth of field and emphasize the subject.
- Experiment with different apertures to achieve varying degrees of background blur and bokeh.
- Consider the artistic effect you want to achieve and adjust the aperture accordingly.
By understanding how to control aperture and depth of field, you can add a layer of creativity and intentionality to your freelensing photography.
Freelensing Photography Tips and Tricks

In this section, I will share valuable tips and tricks to elevate your freelensing photography skills. By exploring different angles, experimenting with bokeh effects and light leaks, and harnessing the magic of freelensing in various lighting conditions, you can capture dreamy and ethereal images that stand out. Let’s dive in!
Experimenting with Different Angles and Perspectives
One of the unique aspects of freelensing is the ability to experiment with unconventional angles and perspectives. By tilting and moving your lens, you can create visually striking compositions that add depth and interest to your images. Don’t be afraid to explore different vantage points and angles to capture a fresh and captivating perspective of your subjects.
Creating Unique Bokeh and Light Leak Effects
Bokeh and light leaks are sought-after effects in freelensing photography. To create bokeh, focus on a specific subject while allowing the background to blur naturally. Experiment with different apertures to adjust the size and shape of the bokeh balls. Light leaks add a touch of whimsy and ethereality to your images. Play with the positioning of your lens and the angle of light to achieve stunning light leak effects.
Capturing Dreamy, Ethereal Images with Freelensing
Freelensing is renowned for its ability to produce dreamy and ethereal images. To enhance these qualities, consider shooting in soft natural light or during the golden hour. Soft, diffused lighting helps to create a dreamlike ambiance in your photographs. Experiment with different focal points and selective focusing to emphasize the magical atmosphere in your images.
Freelensing in Various Lighting Conditions
Don’t let different lighting conditions limit your freelensing creativity. Whether you’re shooting in bright daylight, low light, or artificial lighting, there are ways to adapt and create stunning images. Experiment with exposure settings, use reflectors, or find interesting light sources to add depth and drama to your freelensing photographs.
By incorporating these tips and tricks into your freelensing practice, you can unlock new possibilities and elevate the artistic impact of your images. Embrace the magic of freelensing and watch as your photography skills flourish.
Freelensing Photography Techniques for Specific Genres

In this section, I will discuss the application of freelensing techniques in specific genres of photography. By incorporating freelensing into your workflow, you can unleash your creativity and capture unique and captivating images in various contexts.
Freelensing for Portrait Photography
In portrait photography, freelensing can add an artistic and dreamy aesthetic to your images. By detaching the lens from the camera body and manually tilting it, you can create a shallow depth of field and introduce selective focus.
This technique allows you to highlight specific facial features, emotions, or details, resulting in intimate and visually compelling portraits with a touch of ethereal beauty.
Freelensing in Landscape and Nature Photography
When it comes to capturing the beauty of the natural world, freelensing can add depth and dimension to your landscape and nature photographs. By freelensing, you can introduce a soft and dreamlike quality to your images, enhancing the sense of scale and bringing out intricate details. This technique can help you create atmospheric and evocative compositions that convey a sense of wonder and connection with the environment.
Freelensing for Abstract and Creative Photography
Abstract and creative photography benefit greatly from the unique effects that freelensing can produce. By experimenting with freelensing techniques, you can explore new perspectives, distortions, and blurring effects to create visually striking and unconventional images.
By playing with colors, shapes, and textures, you can push the boundaries of traditional photography and create art that challenges the viewer’s perception and stimulates their imagination.
Freelensing in Street and Urban Photography
In street and urban photography, freelensing can help you capture the energy, spontaneity, and character of bustling city streets and urban environments.
By freelensing, you can create a sense of movement and dynamism, blurring the surroundings while maintaining sharp focus on the subject. This technique allows you to capture moments of authenticity and street life, adding a touch of artistic expression to your urban images.
Through the use of freelensing techniques, you can elevate your photography in these specific genres and create images that stand out from the crowd. The versatility and creative freedom offered by freelensing enable you to explore new possibilities, experiment with different techniques, and push the boundaries of traditional photography.
| Genre | Key Benefits of Freelensing |
|---|---|
| Portrait Photography | – Artistic and dreamy aesthetic – Selective focus and shallow depth of field |
| Landscape and Nature Photography | – Depth and dimension – Soft and ethereal quality – Enhances details and scale |
| Abstract and Creative Photography | – Unique effects and distortions – Pushes the boundaries of traditional photography |
| Street and Urban Photography | – Captures energy and spontaneity – Adds artistic expression – Creates a sense of movement |
Composition Tips for Freelensing Photography

Composition is a fundamental aspect of creating visually captivating photographs, and when it comes to freelensing photography, it’s essential to consider how you frame and compose your images to maximize their impact. In this section, we will explore composition tips specifically tailored to freelensing photography, helping you elevate your images to new heights.
Using Leading Lines and Framing in Freelensing
One powerful compositional technique in freelensing photography is the use of leading lines. These lines naturally draw the viewer’s eye towards the main subject of the image, leading to a more dynamic and engaging composition. Look for natural lines such as roads, pathways, or the contours of a landscape that guide the viewer’s gaze and create visual flow in your freelensed images.
Another effective technique is framing, which involves using elements in the scene to frame your subject. This can be achieved by positioning objects such as branches, archways, or windows strategically in the frame, creating a natural frame within the image. Framing adds depth and context to your freelensed photos, enhancing their visual impact and storytelling potential.
Creating Depth and Layers with Freelensing
Freelensing photography offers a unique opportunity to create depth and layers within your images. By selectively focusing on a specific subject while deliberately blurring other elements, you can create a sense of depth and three-dimensionality in your photos.
Experiment with adjusting your focal point and aperture settings to selectively blur or sharpen elements within the frame. This technique helps guide the viewer’s attention, leading to a more immersive visual experience and adding a sense of depth to your freelensed images.
Emphasizing Textures and Patterns through Freelensing
One of the advantages of freelensing photography is its ability to emphasize textures and patterns, adding a tactile quality to your images. By selectively focusing on the intricate details of a subject, you can highlight its unique textures, whether it’s the rough bark of a tree, the grain of sand, or the fabric of a piece of clothing.
Experiment with different angles and perspectives to showcase the textures and patterns in your freelensed photos. Additionally, consider utilizing soft, diffused lighting to bring out the finer details and enhance the overall visual impact of the textures and patterns within your composition.
Storytelling and Mood Creation with Freelensing Photography
Freelensing photography offers a powerful platform for storytelling and mood creation. By carefully selecting your subject and incorporating elements within the frame, you can evoke specific emotions and narratives within your images.
Consider the desired mood or story you want to convey before capturing your freelensed photos. Choose your subject, surroundings, and lighting conditions to align with the narrative or mood you wish to express. This conscious decision-making process will enable you to create images that engage viewers on an emotional level, making your freelensing photography more impactful and memorable.
Post-Processing Freelensed Images

Post-processing is a crucial step in optimizing and enhancing the visual impact of your freelensed images. By applying various editing techniques, you can elevate the artistic expression and uniqueness of your photos. In this section, I will discuss essential post-processing techniques specific to freelensed images, enabling you to bring out the full potential of your work.
RAW vs. JPEG for Freelensing Photography
When post-processing freelensed images, it is recommended to shoot in RAW format rather than JPEG. RAW files contain a wealth of data captured by the camera’s sensor, giving you greater flexibility and control during post-processing. RAW files preserve more dynamic range, allowing for adjustments to exposure, white balance, and color grading without compromising image quality.
In comparison, JPEG files are processed in-camera, resulting in lossy compression and limited editing capabilities. While shooting in JPEG may be convenient in certain situations, such as quick and casual shoots, RAW files provide the best foundation for achieving professional-grade freelensed images.
Adjusting Exposure and White Balance in Post
One of the primary benefits of shooting in RAW is the ability to fine-tune exposure and white balance during post-processing. Adjusting exposure allows you to control the brightness, contrast, and tonal range of your image. You can bring out details in the shadows or recover highlights to ensure a well-balanced exposure.
Similarly, white balance adjustments are crucial for accurate color representation in your freelensed photos. You can correct any color casts or creatively manipulate the temperature and tint to enhance the mood and ambience of your image.
Enhancing Colors and Tones in Freelensed Photos
Freelensing often lends itself to dreamy and ethereal imagery, and post-processing provides an opportunity to enhance these qualities. By selectively adjusting colors and tones, you can create a more captivating and magical visual experience.
Experiment with selective color grading to emphasize certain hues or create color harmonies that evoke specific emotions. Additionally, adjusting contrast, saturation, and vibrance can amplify the visual impact and overall richness of your image.
Creative Editing Techniques for Freelensing Photography
Freelensing opens up a world of artistic possibilities, allowing you to push the boundaries of traditional photography. To further enhance the impact of your freelensed images, consider exploring creative editing techniques.
Experiment with adding texture overlays to create a vintage or painterly effect. Incorporate light leak effects or bokeh overlays to enhance the dreamy and whimsical atmosphere. You can also experiment with unconventional cropping or framing techniques to create a unique and visually striking composition.
Common Mistakes to Avoid in Freelensing Photography

While freelensing photography allows for creative exploration and artistic expression, it also presents unique challenges. In this section, I will highlight some common mistakes that beginners often make in freelensing photography and provide valuable tips on how to avoid them. By being aware of these pitfalls and implementing the suggested techniques, you can enhance your skills and produce exceptional freelensing images.
Dealing with Lens Flare and Light Leaks
A common hurdle in freelensing photography is dealing with lens flare and light leaks, which can result in unwanted artifacts and reduced image quality. To minimize these issues, consider the following:
- Use a lens hood: Attach a lens hood to your lens to reduce the amount of stray light entering the lens and causing flare.
- Adjust your shooting angle: Experiment with different shooting angles to minimize direct light sources that may cause flare.
- Create a light-blocking barrier: Use your hand or an object to block any light sources that are causing unwanted flare or light leaks.
Preventing Dust and Debris on the Sensor
Dust and debris on the sensor can significantly impact the quality of your freelensing images. To prevent this issue, follow these preventive measures:
- Keep your camera gear clean: Regularly clean your camera and lens to minimize the accumulation of dust and debris on the sensor.
- Change lenses carefully: When changing lenses, do so in a clean, dust-free environment to minimize the risk of contaminants entering the camera.
- Use protective filters: Consider using a protective filter on your lens to act as a barrier against dust and debris.
Avoiding Camera Shake and Blurry Images
Camera shake can lead to blurry images, so it’s important to implement techniques that reduce the risk of camera shake while freelensing. Here are some tips to help you achieve sharp images:
- Use proper handholding techniques: Hold your camera and lens steadily with both hands, using good posture and supporting the weight of the camera to minimize any shaking or movement.
- Use image stabilization: If your camera or lens has built-in image stabilization, make sure it is activated to minimize the impact of camera shake.
- Use a tripod or support: When shooting in challenging lighting conditions or when a slower shutter speed is necessary, use a tripod or any stable surface to eliminate camera shake completely.
Overcoming Focusing Challenges in Freelensing
Focusing with freelensing can be a challenge since the lens is detached from the camera body. To overcome this hurdle, consider the following techniques:
- Practice manual focus: Develop your manual focus skills to accurately focus on your desired subject when freelensing.
- Use focus peaking: If your camera supports focus peaking, enable this feature to assist in achieving precise manual focus.
- Experiment with focus distance: Experiment with different focus distances to create unique depth of field effects and artistic outcomes.
By being aware of and avoiding these common mistakes in freelensing photography, you can elevate your skills and produce stunning images that truly capture the essence and beauty of this unique technique.
Inspiration and Ideas for Freelensing Photography

As you continue to develop your skills in freelensing photography, finding inspiration and exploring new ideas becomes essential. In this section, we will delve into various sources of inspiration and discuss how they can fuel your creativity and propel your freelensing journey to new heights.
Studying the Works of Renowned Freelensing Photographers
One of the best ways to gain inspiration and insights in freelensing photography is by studying the works of renowned freelensing photographers. Take the time to explore their portfolios and examine their creative approach to the technique. Pay attention to their compositions, use of light, and unique perspectives. By immersing yourself in the works of these talented individuals, you can gain a deeper understanding of the artistic possibilities and push your own boundaries.
Participating in Freelensing Photography Challenges and Projects
Engaging in freelensing photography challenges and projects is not only a great way to push your creative boundaries but also an opportunity to learn from and collaborate with fellow freelensing enthusiasts. These challenges often provide specific prompts or themes that can inspire you to try new techniques or experiment with different subjects. Participating in these activities can help you expand your skills, get valuable feedback, and build a supportive network within the freelensing community.
Exploring Creative Themes and Concepts for Freelensing
Another way to find inspiration for your freelensing photography is by exploring creative themes and concepts. Consider using freelensing to capture emotions, tell stories, or convey abstract ideas. Experiment with different genres, such as portrait, landscape, nature, or street photography, using freelensing to add a unique and artistic touch to your images. By approaching freelensing with specific themes or concepts in mind, you can challenge yourself creatively and create visually striking and thought-provoking photographs.
Sharing and Showcasing Your Freelensing Photography
Finally, don’t forget the importance of sharing and showcasing your freelensing photography. Whether through social media platforms, personal websites, or online photography communities, sharing your work allows you to gain exposure, connect with other photographers, and receive valuable feedback. It also serves as a platform for inspiration and can inspire others in return. By sharing your freelensing journey, you not only contribute to the growing community but also open yourself up to new opportunities for collaboration and recognition.
In conclusion, finding inspiration and exploring new ideas is crucial in the world of freelensing photography. By studying the works of renowned freelensing photographers, participating in challenges and projects, exploring creative themes and concepts, and sharing your own work, you can continuously grow as a photographer and unlock the full creative potential of freelensing photography. So go out there, immerse yourself in the world of freelensing, and let your imagination soar through the lens.
Conclusion
As we come to the end of this comprehensive guide on freelensing photography techniques for beginners in 2024, it is clear that freelensing offers a world of creative possibilities and artistic self-expression. Throughout this article, we have explored the concept of freelensing and its unique differences from traditional photography techniques. We have examined the essential equipment needed for freelensing and provided tips on how to set up your camera for optimal results.
But freelensing is more than just a technical skill—it is a captivating and magical way to capture images that evoke emotions and tell stories. By embracing freelensing in 2024, you can immerse yourself in a realm of dreamy and ethereal imagery, experimenting with different angles, perspectives, and lighting conditions. This technique allows you to create bokeh effects and unique light leak patterns that add depth and character to your photos.
However, mastering freelensing requires continuous practice, experimentation, and an open mind. By exploring different genres such as portrait, landscape, abstract, and street photography, you can truly unlock the full potential of freelensing. Remember, each image you create is a unique interpretation of the world around you, imbued with your own vision and creativity.
So, fellow photographers, let us embrace the magic of freelensing in 2024. Let us push the boundaries of our creativity, expand our skills, and share our unique perspectives with the world. Remember, the journey of freelensing is an ongoing one, and the more we practice and explore, the more we refine our craft and capture extraordinary moments of beauty.