As a professional photographer, I have spent countless nights capturing stunning images after dark. Night photography can be challenging, but with the right techniques, it can be incredibly rewarding. In this section, I will share my top night photography tips to help you navigate low light conditions and capture the magic of the night.
First and foremost, it’s essential to understand that night photography requires a different set of skills and equipment than daytime photography. By mastering the fundamentals of exposure, composition, and camera settings, you’ll be well-equipped to capture beautiful and striking night images.
Key Takeaways:
- Mastering night photography requires knowledge of exposure, composition, and camera settings.
- It’s critical to have the right equipment, such as a tripod and wide aperture lens, to capture sharp and well-exposed night images.
- Understanding the basics of exposure, including ISO, aperture, and shutter speed, is essential for achieving proper exposure in low light conditions.
- Experimenting with techniques like astrophotography, light painting, and capturing light trails can add creativity and excitement to your night photography.
- Don’t be afraid to embrace low light conditions and seek inspiration in the beauty of the night.
Understanding the Basics of Night Photography
Photographing at night can be an incredibly rewarding experience, but it requires a different approach than shooting in daylight. With less light available, it’s essential to understand the basics of night photography to capture stunning images. Below, I’ll cover essential tips on low light photography ideas, tripod use, exposure, and camera settings for night photography.
The Importance of tripod use
One of the key elements of capturing sharp night images is using a tripod. A tripod helps stabilize your camera, prevents camera shake or blur, and allows for longer exposures. When using a tripod, make sure it’s stable and level to avoid any wobbling or movement. Additionally, using a remote shutter release cable or self-timer can further reduce any shake or movement from pressing the camera’s shutter button.
Understanding Exposure
Exposure is the amount of light that enters the camera when taking a photo. In night photography, it’s essential to understand the exposure triangle, which is made up of three factors: ISO, aperture, and shutter speed. ISO determines the camera’s sensitivity to light, aperture refers to the size of the camera’s lens opening, and shutter speed is the length of time the camera’s shutter remains open while taking a photo. Finding the right balance between these three elements is crucial to achieving proper exposure in low light conditions.
Selecting the Right Camera Settings for Night Photography
When shooting at night, there are several camera settings that you’ll need to adjust to ensure proper exposure. Some basic settings to start with are a low ISO number, a wide aperture, and a slow shutter speed. A low ISO number will reduce the camera’s sensitivity to light, a wide aperture will allow more light into the camera, and a slow shutter speed will enable you to capture more light. However, these settings will depend on the lighting conditions of your shot and the effect you want to achieve.
Another essential setting is the focus. When shooting at night, it can be challenging for your camera to autofocus, so manually focusing your lens may be necessary. To do this, switch your camera’s focus mode to manual focus and use the live view display to focus on your subject.
Lastly, consider shooting in RAW file format. RAW files contain more data than JPEG files, giving you more flexibility during post-processing to adjust exposure, white balance, and color temperature.
By understanding the basics of night photography, such as using a tripod, understanding exposure, and selecting the right camera settings, you’ll be well on your way to capturing stunning images in low light conditions.

Choosing the Right Equipment for Night Photography
When it comes to night photography, having the right equipment is crucial to producing high-quality images. Here are some essential gear and camera settings that can help you capture stunning night photos:
Cameras
When selecting a camera for night photography, look for one with manual settings and high ISO capabilities. A full-frame camera can be ideal for capturing low light scenes. Some popular options include:
| Camera Model | Price | Description |
|---|---|---|
| Sony A7 III | $1,799 | Full-frame mirrorless camera with 24.2-megapixel resolution and excellent low-light performance. |
| Nikon D850 | $2,996.95 | Full-frame DSLR camera with 45.7-megapixel resolution and high ISO capability. |
| Canon EOS R6 | $2,899 | Full-frame mirrorless camera with 20.1-megapixel resolution and high ISO performance for low light scenes. |
Lenses
When it comes to lenses for night photography, a fast aperture is crucial to letting in enough light for your photos. Wide-angle lenses are also ideal for capturing expansive night scenes. Here are some popular options:
- Canon EF 16-35mm f/2.8L III USM
- Nikon AF-S NIKKOR 14-24mm f/2.8G ED
- Sony FE 16-35mm f/2.8 GM
Tripods
A sturdy tripod is essential for keeping your camera steady during long exposures. Look for one with a weight capacity that can support your camera and lens, and consider a tripod with a hook for hanging a weight to provide extra stability in windy conditions.
Camera Settings
Here are some suggested camera settings for night photography:
- Use manual mode to control your camera settings
- Set your ISO to a high value, such as 1600 or 3200
- Choose a wide aperture, such as f/2.8 or wider, to let in more light
- Select a slow shutter speed, such as 30 seconds or longer, for long exposures

Mastering Exposure for Night Photography
When it comes to night photography, achieving proper exposure is crucial to producing stunning images. In this section, I’ll explain the key settings you need to master to ensure your night photos are as captivating and well-exposed as possible.
The Exposure Triangle
The exposure triangle is a concept that refers to the three settings that control the amount of light that enters your camera: aperture, shutter speed, and ISO. Understanding how these settings work together is essential to mastering exposure in night photography.
Aperture refers to the size of the opening in your lens through which light enters your camera. In night photography, using a wider aperture (lower f-number) can help you capture more light and create a shallower depth of field. This can be ideal for creating bokeh (blurred background) effects or isolating your subject.
Shutter speed controls the length of time that your camera’s sensor is exposed to light. In low light conditions, using a longer shutter speed (slower shutter) can help you capture more light and create longer exposure effects such as light trails or star trails.
ISO measures the sensitivity of your camera’s sensor to light. In night photography, using a higher ISO can help you capture more light but can also introduce noise or graininess to your photos. The key is to find a balance between ISO and shutter speed to achieve a well-exposed image with minimal noise.
Long Exposures for Night Photography
Long exposures can be a powerful tool in night photography, allowing you to capture stunning starry skies, light trails, and other creative effects. However, shooting long exposures can also introduce challenges such as camera shake and motion blur.
To minimize the effects of camera shake, it’s critical to use a sturdy tripod and a remote shutter release to avoid touching your camera. Additionally, using image stabilization (IS) lenses or in-camera stabilization can help stabilize your camera during long exposures.
Another key technique for long exposures is to use Bulb mode, which allows you to control the length of your exposure manually. This mode is ideal for capturing fireworks or other short bursts of light.
Painting with Light
Painting with light is a technique that involves using a light source such as a flashlight or glow stick to illuminate the subject or scene during a long exposure. This can create striking and creative effects such as light graffiti or highlighting specific parts of the image.
When painting with light, it’s essential to work in a dark environment and avoid shining the light directly at the camera or lens. Experiment with different light sources and angles to create unique and interesting effects.

Mastering exposure is key to creating captivating night photographs. By understanding how the exposure triangle works and experimenting with long exposures and light painting, you can unlock the full potential of night photography and capture stunning images that showcase the beauty of the night.
Capturing the Night Sky
One of the most awe-inspiring and captivating subjects for night photography is the night sky. Capturing the stars, the moon, and other celestial objects can create stunning and unforgettable images that leave a lasting impression on viewers. In this section, I’ll share some tips and techniques for photographing the night sky.
Astrophotography
Astrophotography is the art of capturing images of celestial objects such as stars, galaxies, and nebulae. To capture these images, you’ll need a camera with manual controls, a sturdy tripod, and a telephoto lens. It’s also vital to choose a location away from city lights to reduce light pollution and increase the visibility of stars and other celestial objects.
When it comes to camera settings, start with manual mode, set your ISO to its lowest setting, and choose a wide aperture (f/2.8 or lower) to let in as much light as possible. Use a high shutter speed (10-20 seconds) to limit motion blur. Experiment with different settings to find the right balance between exposure and sharpness.
When composing your shot, try to include an interesting foreground or context to give your image a sense of depth and perspective. Use a remote shutter release or timer to reduce camera shake and avoid touching your camera during the exposure.
Photographing the Moon
The moon is a fascinating subject for night photography, and its phases offer different creative opportunities. To capture a sharp and well-exposed image of the moon, it’s essential to use a tripod, a telephoto lens, and manual focus.
When it comes to camera settings, start with an ISO of 100, a shutter speed of 1/125th of a second, and an aperture of f/11. If you’re shooting a full moon, you may need to adjust your exposure to compensate for the brightness.
Pay attention to the moon’s position and choose a background that complements its color and shape. Experiment with different compositions, such as including trees or mountains in the frame, to add depth and interest to your image.
The Milky Way
The Milky Way is a spectacular sight in the night sky, and capturing its beauty can create breathtaking images. To photograph the Milky Way, you’ll need a sturdy tripod, a wide-angle lens, and manual focus.
When it comes to camera settings, start with an ISO of 3200-6400, an aperture of f/2.8 or lower, and a shutter speed of 25-30 seconds. Choose a location away from city lights to reduce light pollution and increase visibility.
Use foreground elements such as trees, mountains, or buildings to give your image a sense of scale and context. Experiment with different angles, compositions, and exposure settings to find the perfect balance between exposure and detail.

Capturing the night sky can be a challenging and rewarding experience. With the right equipment, settings, and techniques, you can create stunning and unforgettable images that showcase the beauty of the cosmos.
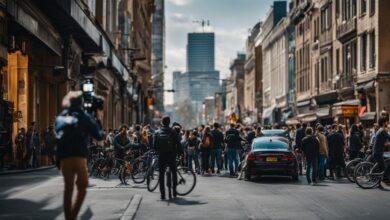
Creating Stunning Light Trails
City night photos offer a range of creative opportunities for capturing stunning night-time images. One of my favorite techniques to add a sense of motion and excitement to night photographs is by capturing light trails from moving vehicles. Here are some tips to help you get started:
Setting up your camera
For capturing light trails in cityscapes, a tripod is essential to keep your camera steady and minimize shakes. Set your camera to manual mode to have full control over the exposure settings. Start with an aperture of f/8 to create a deep depth of field and adjust the shutter speed to several seconds or more to capture light trails. Experiment with different shutter speeds until you achieve the desired effect.
Choosing the right location
Find a location with heavy traffic, such as a busy highway, intersection or bridge. The traffic should be moving in one direction to ensure consistent light trails. Try to avoid spots with bright streetlights or light sources that could interfere with your exposure.
Capturing light trails
Once you’re set up, start taking photos as the traffic passes by. Use a remote shutter release or set the self-timer to avoid any camera shake when you press the shutter button. Experiment with different angles and perspectives to capture dynamic light streaks from moving cars, trains, buses or even fireworks.
Check out this example of a city night photo with light trails:

Tip: For a more dramatic effect, try combining light trails with cityscapes and buildings for a unique composition.
Experimenting with Light Painting in Night Photography
One of the most creative techniques in night photography is light painting. With light painting, you can use various light sources such as flashlights, glow sticks, or even sparklers to create unique and artistic effects. The key to successful light painting is having a dark environment for the light to stand out against.
To get started with light painting, find a location with a dark background, such as a park or an abandoned building. Use a tripod to stabilize your camera and set your exposure to a long shutter speed. This will allow for enough time to create light trails with your chosen light source.
Using Flashlights for Light Painting
One of the most popular light sources for light painting is a flashlight. You can use a flashlight to create light trails, illuminate subjects, or even write words in the air. To create light trails, simply point the flashlight at your camera and move it along the desired path. The longer the exposure, the longer the light trails will be.

Using Glow Sticks for Light Painting
Glow sticks are another popular tool for light painting. They come in a variety of colors and can be used to create unique and dynamic effects. To use a glow stick, crack it to activate the chemicals inside and then start waving it around in front of the camera. Make sure to move the glow stick quickly to create fluid and organic movements in your light trails.
Using Other Light Sources for Light Painting
There are many other light sources you can use for light painting, such as sparklers, LED lights, and even fireworks. Each light source will create a unique effect that can add an artistic touch to your night images. Experiment with different sources to discover what works best for your images.
Light painting is a fun and creative way to add a unique touch to your night photography. With a little bit of practice and experimentation, you can create stunning and one-of-a-kind images that are sure to impress.
Enhancing Composition in Night Photography
Composition is an essential element of any photograph, and it is especially crucial in night photography. The right composition can make the difference between a good image and a great one. To enhance the composition of your night shots, consider the following tips:
1. Include Foreground Interest
Incorporating foreground interest into your shot can add depth and dimension to your image. Look for objects or elements that you can use to frame your subject or create leading lines that draw the viewer’s eye into the scene. For example, you can use a tree or a building in the foreground to add interest and perspective to a cityscape.
2. Experiment with Angles
Try shooting from different angles to add variety to your images. You can shoot from a low angle to emphasize the size and scale of your subject, or shoot from above to create a unique perspective.
3. Play with Light and Shadows
Lighting is just as important in night photography as it is in any other type of photography. Use the contrast between light and shadows to create mood and drama in your images.
4. Use Symmetry and Patterns
Symmetry and patterns can add visual interest to your photos. Look for patterns in architecture, such as repeating shapes or lines, and use them to create a visually pleasing composition.
5. Keep it Simple
Too many elements in your shot can be distracting and take away from the overall impact of your image. Keep it simple and focus on your subject.

By applying these composition tips, you can add depth, interest, and creativity to your night shots. Experiment with different techniques and see what works best for your style and subject matter. With practice and patience, you’ll soon be capturing stunning night images that tell a compelling story.
Dealing with Noise in Night Photography
One of the common challenges in night photography is the introduction of noise in your images. Noise can occur when capturing images in low light conditions and can result in grainy or pixelated images. But fear not, as there are techniques you can use to minimize noise in your night photography.
One effective technique to minimize noise is long exposure photography. Longer exposure times allow more light to enter the camera, resulting in a better-exposed image with less noise. However, be mindful of exposures that are too long, as this can lead to overexposure and loss of detail in highlights.
Another way to reduce noise is through noise reduction in post-processing. Most photo editing software has noise reduction tools that can help remove noise from your images. These tools work by analyzing the image and reducing noise without compromising detail and sharpness.
Lastly, selecting the appropriate ISO settings can also help reduce noise in your images. Higher ISO settings can produce more noise, so it’s best to keep your ISO as low as possible while maintaining proper exposure.
Long Exposure vs. High ISO
To showcase the difference between long exposure and high ISO, I conducted an experiment. I took two pictures of the same subject, one with a long exposure and the other with a high ISO.
| Long Exposure | High ISO |
|---|---|
 |  |
As you can see, the image captured with a long exposure has less noise and a clearer image compared to the image captured with a high ISO. Keep in mind that the results may vary depending on your camera and the available light conditions.
By using techniques like long exposure photography, noise reduction in post-processing, and selecting appropriate ISO settings, you can minimize noise in your night photography and produce cleaner and sharper images.
Perfecting White Balance in Night Photography
One of the crucial elements in creating stunning night photos is perfecting the white balance. White balance is responsible for the overall color temperature of an image and can significantly impact the mood and tone of your night photographs.
When adjusting white balance for night photography, keep in mind that the lighting conditions can vary greatly from scene to scene. Artificial lights, moonlight, and starlight all have different color temperatures that can affect the white balance of your photos. To achieve accurate colors, you need to adjust your camera settings accordingly.
Camera Settings for Night Photography
Here are some camera settings you can adjust to perfect the white balance of your night photography:
| Setting | Description |
|---|---|
| Custom White Balance | Custom white balance is the most accurate way to achieve the correct color temperature for a specific scene. To set a custom white balance, take a photo of a neutral gray or white object in the same lighting conditions as the scene you’re photographing. Then, select that image as your custom white balance reference in the camera settings. |
| Auto White Balance | Auto white balance can be useful when shooting in varying lighting conditions. However, it may not always produce accurate results in night photography. |
| Preset White Balance | Most cameras have preset white balance options, such as tungsten, fluorescent, and daylight. These presets can be helpful in adjusting the white balance to match the lighting conditions. |
| Manual White Balance | Manual white balance allows you to fine-tune the color temperature by adjusting the Kelvin value. Use this setting if you’re experienced in recognizing and adjusting for specific color casts. |
Experiment with these settings to find the best option for your particular night photography situation.
Adjusting for Light Temperature
Another factor to consider when perfecting white balance in night photography is the color temperature of the light sources in your scene. Different light sources have different color temperatures, measured in degrees Kelvin.
For instance, tungsten lights have a warm, yellow-orange hue with a color temperature of around 3200K, while fluorescent lights have a cooler, blue-green hue with a color temperature of around 4000-5000K. Standard daylight has a color temperature of around 5500K.
Understanding the color temperature of the light sources in your scene can help you adjust your white balance settings to achieve the desired effect.
Avoiding Mixed Lighting
Mixed lighting occurs when multiple light sources with different color temperatures are present in the same scene. This type of lighting can create color casts and affect the overall white balance of your photos.
To avoid mixed lighting, try to shoot in areas with uniform lighting, or use gels or filters to balance multiple light sources. Alternatively, you can adjust the white balance in post-processing to correct any color casts.

Perfecting white balance in night photography can take time and practice, but with these tips, you’ll be able to achieve accurate and visually pleasing colors in your night images.
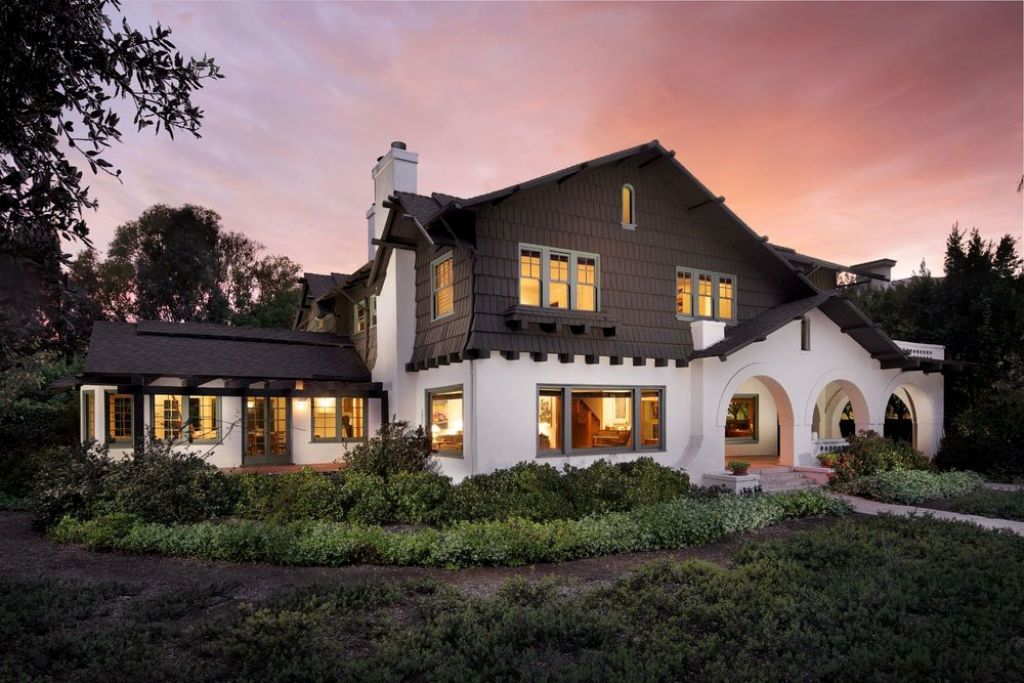
Exploring Urban Nightscapes
As a photographer, I find urban landscapes at night to be both fascinating and challenging to capture. With the right techniques, you can create stunning images that showcase the beauty of cityscapes after dark. Here are some tips and techniques to help you capture the perfect Night Cityscape:
Look for Interesting Subjects and Angles
When photographing a city skyline at night, think about unique angles that can make an ordinary scene stand out. Experiment with different perspectives, such as shooting from a low angle or using a foreground element to add depth and interest to your composition. Look for interesting subjects, such as buildings with unique architecture or well-lit landmarks that can serve as the focal point of your image.
Consider the Lighting Conditions
Cityscapes at night offer a wide range of lighting conditions, from bright and colorful neon lights to dark and shadowy alleys. Understanding how to work with these different lighting situations can help you capture compelling images. Consider using long exposures to create interesting light trails from passing cars or capturing the reflections of city lights on water surfaces. You can also use street lamps or other light sources to create interesting contrasts and shadows in your images.
Use a Tripod and Remote Shutter Release
Low light conditions can make it difficult to capture sharp, well-exposed images without camera shake. Using a tripod and remote shutter release can help stabilize your camera and prevent blur caused by camera movement. When using a tripod, be sure to set your camera to a low ISO and use a slow shutter speed to capture the scene properly.
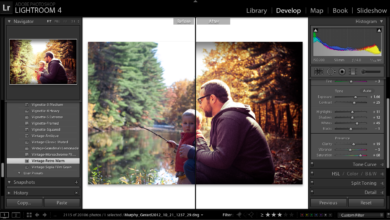
Experiment with Post-Processing Techniques
Post-processing can be an effective way to enhance your Night Time City Pictures. With editing software like Adobe Lightroom or Photoshop, you can adjust the brightness, contrast, and color of your images to achieve the desired effect. You can also use techniques like dodging and burning to selectively lighten or darken specific parts of your image.
By following these tips and techniques, you can capture stunning Night Cityscape images that showcase the beauty and vibrancy of urban landscapes at night.

Embracing Low Light Photography
Low light photography can be challenging, but it can also lead to some of the most atmospheric and creative images. Embracing low light conditions requires a different approach to photography and a willingness to experiment. In this section, I’ll share some techniques and tips for getting the most out of low light photography.
Working with Available Light
When shooting in low light conditions, it’s important to make the most of any available light sources. This could be streetlights, city lights, or even the moon. One technique for working with available light is to shoot at the blue hour, which is the period of time just after sunset or right before sunrise when the sky has a deep blue color. This can create a beautiful backdrop for your subject.
Another approach is to use the light to create a moody and atmospheric look. For example, if you’re shooting in a city, try capturing the glow of the streetlights or the neon lights of a storefront. This can add a unique and intriguing element to your photograph.
Using a Tripod for Low Light Photography
Low light conditions often require longer exposure times, which can lead to blurry and shaky images. To combat this, it’s crucial to use a tripod to keep your camera steady. When using a tripod, make sure to turn off any image stabilization features on your lens or camera, as these can actually introduce shake when mounted on a tripod.
Another tip is to use a remote trigger or the camera’s self-timer to avoid touching the camera during the exposure. This can further reduce any shake or movement that could impact the sharpness of your photograph.
Experimenting with Camera Settings
When shooting in low light conditions, it’s essential to understand your camera’s settings and how they can affect your images. For example, increasing the ISO can make your camera more sensitive to light, but it can also introduce noise into your images.
Shooting in manual mode can give you greater control over your camera’s settings, allowing you to adjust the aperture and shutter speed to achieve the desired exposure. It’s also important to pay attention to the metering mode your camera is using, as this can impact the exposure of your image.
Playing with Shadows and Silhouettes
Low light conditions can create interesting shadows and silhouettes, which can add depth and drama to your images. To capture these elements, try positioning your subject against a light source, such as a streetlight or the moon.
Another technique is to intentionally underexpose your image to create a silhouette effect. This can be achieved by setting your camera to spot metering and focusing on the brightest part of the scene, which will cause the rest of the image to appear darker.

Low light photography can be challenging, but it can also be incredibly rewarding. By embracing low light conditions and experimenting with different techniques, you can capture stunning and unique images that stand out from the crowd.
Finding Inspiration in Night Photography
As a night photographer, I’m always on the lookout for new and creative ideas to capture stunning after-dark images. However, even the most seasoned photographer needs a little inspiration from time to time. In this section, I’ll share some of my favorite night photography ideas and tips to spark your creativity.
Explore Different Locations
One of the best ways to find inspiration for night photography is to explore different locations. Whether it’s a busy city street or a peaceful rural landscape, each place offers unique opportunities to capture stunning night scenes. Try visiting new locations and experimenting with different angles and perspectives to create fresh and exciting images.
Look Up at the Night Sky
The night sky offers an endless source of inspiration for night photographers. Whether you’re capturing stars, the moon, or other celestial objects, the night sky provides an ever-changing canvas for creativity. Consider using astrophotography techniques to create breathtaking images of the Milky Way or try capturing the moon in different phases to add interest and variety to your portfolio.

Experiment with Light Painting
Light painting is a fun and creative technique that allows you to paint with light during long exposures. By using flashlights, glow sticks, or other light sources, you can create unique and artistic effects in your night photography. Try experimenting with different light sources and colors to create a range of effects and moods.
Capture Urban Landscapes
Cities come alive at night, offering a wealth of opportunities for stunning night photography. Whether you’re capturing the city lights or photographing architectural marvels, urban landscapes provide endless creative possibilities. Consider experimenting with different camera settings and compositions to create compelling images that showcase the beauty of the city at night.
Seek Unique Night Scenes
Sometimes, the most interesting night scenes can be found in unexpected places. Consider looking for unique and unusual locations to capture stunning night images. Whether it’s a hidden park or an abandoned building, these scenes can offer a fresh perspective and inspire your creativity.
By exploring different locations, experimenting with techniques like light painting, and seeking out unique night scenes, you can find endless inspiration for your night photography. Remember to always keep an open mind, and don’t be afraid to try new things. The night offers a world of creative possibilities waiting to be captured through your lens.
Troubleshooting Common Night Photography Issues
Despite our best efforts, night photography can present some unique challenges and issues. In this section, I’ll address some common problems and provide solutions to keep your night images sharp and well-exposed.
Camera Shake
One of the most common issues in night photography is camera shake, which can result in blurry images. To avoid camera shake, always use a tripod and a remote shutter release or self-timer to take the shot. Alternatively, try using the camera’s built-in timer function.
Focusing in Low Light
Focusing can be a challenge in low light conditions, especially when capturing distant subjects like stars. Here are some tips to help with focusing:
- Switch to manual focus mode and use live view to focus manually on a bright star or distant light source.
- Use the camera’s autofocus to focus on a nearby bright light source, then switch to manual focus mode to lock in the focus.
- Try using a flashlight or headlamp to illuminate the subject briefly while focusing, then switch off the light and take the shot.
Dealing with Harsh Lighting Conditions
Harsh lighting conditions can cause blown-out highlights or shadows that lack detail. To avoid these issues, try the following techniques:
- Use a graduated filter to balance the exposure between the sky and foreground in landscape shots.
- Use exposure bracketing and merge the images during post-processing to bring out details in shadows and highlights.
- Consider shooting during the golden hour, which is the time just before sunset or just after sunrise, when the light is softer and more even.
Long Exposure Noise
Long exposures can result in noise or grain in the image. To minimize noise, try these techniques:
- Shoot with the lowest ISO possible and use a longer exposure time to compensate.
- Use noise reduction in-camera or during post-processing, but be careful not to overdo it as this can result in loss of detail.
- Consider investing in a camera with a full-frame sensor, which typically performs better in low light conditions.
By addressing these common night photography issues, you’ll be well on your way to capturing stunning and well-exposed images after dark. With practice and persistence, you’ll develop the skills and techniques needed to overcome any challenge and produce outstanding night photographs.

The Joys of Night Photography
For me, there’s something truly magical about capturing the world after dark. Night photography offers a unique opportunity to witness the world in a different light, quite literally. With a camera in hand, you can capture the beauty of the night sky, explore urban landscapes in a new way, and experiment with creative techniques like light painting and long exposures.
One of my favorite subjects to photograph at night is the stars. There’s nothing quite like the feeling of gazing up at a clear night sky and witnessing the universe’s vastness. With a little bit of patience, the right gear, and knowledge, you can capture the beauty of the stars and create stunning astro-photography. Whether you’re photographing the Milky Way or capturing a shooting star, there’s always something awe-inspiring to capture.
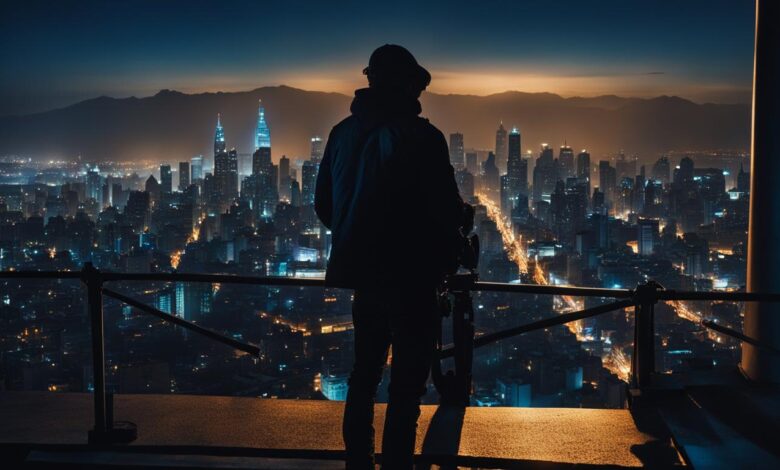
But stars aren’t the only subject that shines at night. Cities come alive after dark, offering endless opportunities to capture vibrant and dynamic images. From the glow of streetlights to the reflections in the city’s skyscrapers, there’s a unique energy to urban nightscapes that’s hard to resist.
Another aspect of night photography that I find fascinating is experimenting with different light sources. With techniques like light painting, you have the opportunity to add your own creative touch to your images and create something truly unique. By using flashlights, glow sticks, or other light sources, you can create shapes, patterns, and textures in your photographs.

Of course, night photography isn’t without its challenges. Low light conditions can make capturing sharp and well-exposed images difficult. But with the right equipment, techniques, and knowledge, you can overcome these challenges and capture stunning night images.
Whether you’re a seasoned pro or just starting, night photography offers endless opportunities for creativity and exploration. So grab your camera, head out into the night, and see what wonders you can capture.
Explore the Beauty of the Night
Whether you’re a beginner or an experienced photographer, there’s always room for exploration and inspiration. With the myriad of possibilities offered by night photography, you can create unique and memorable images that capture the beauty of the world after dark.
Remember to keep experimenting, trying out new techniques, and expanding your creative vision. With the right mindset and approach, you’ll discover that there’s always something new and exciting to learn in the world of night photography.
Share Your Journey with Others
One of the joys of photography is sharing your images and experiences with others. Whether it’s through social media platforms, photography blogs, or local exhibitions, sharing your work can inspire others and create a sense of community and connection.
So don’t be afraid to share your journey, your struggles, and your triumphs with others. By doing so, you can inspire others to pursue their own passion for night photography and astrophotography.
Thank you for joining me on this journey of exploring the captivating realm of night photography. I hope these tips and techniques will help you achieve your creative vision and capture stunning images of the night sky and beyond.
FAQ
What are some top night photography tips for budding photographers?
In this section, I will share my top night photography tips to help aspiring photographers capture stunning images after dark. Whether you’re new to night photography or looking to improve your skills, these tips will help you navigate low light conditions and capture the magic of the night.
What are the basics of night photography that I should understand?
Before diving into night photography, it’s important to understand the basics. In this section, I’ll cover the essentials such as the importance of tripod use, understanding exposure, and selecting the right camera settings for low light conditions. By mastering these fundamentals, you’ll be well-equipped to capture stunning night images.
What equipment do I need for night photography?
The right equipment can make a significant difference in your night photography results. In this section, I’ll discuss essential gear such as cameras, lenses, and tripods that can enhance your ability to capture sharp and well-exposed night images. Additionally, I’ll provide insights into camera settings that work best for low light conditions.
How can I achieve proper exposure in night photography?
Achieving proper exposure is crucial in night photography. In this section, I’ll explain concepts like ISO, aperture, and shutter speed and how they impact the exposure of your images. I’ll also provide tips on using long exposures to capture stunning night scenes and painting with light to add creative effects.
How can I capture the night sky in my photographs?
The night sky offers incredible opportunities for photography. In this section, I’ll share techniques to capture stars, the moon, and other celestial objects. From astrophotography to capturing the Milky Way, you’ll learn how to create breathtaking night sky images.
How can I capture light trails in my night photographs?
Light trails can add a sense of motion and excitement to your night photographs. In this section, I’ll provide tips on capturing light trails from moving vehicles, such as cars, trains, or even fireworks. You’ll learn how to set up your camera to capture these dynamic light streaks.
How can I experiment with light painting in my night photography?
Light painting is a creative technique that allows you to paint with light during long exposures. In this section, I’ll explain how to use flashlights, glow sticks, or other light sources to create artistic and unique effects in your night photography. You’ll discover how to unleash your creativity and add a touch of magic to your images.
How can I enhance the composition in my night photography?
Composition plays a vital role in any photograph, including night photography. In this section, I’ll share composition techniques and tips specifically tailored for night images. From leading lines to framing techniques, you’ll learn how to create visually pleasing compositions that make your night shots stand out.
How can I deal with noise in my night photography?
Shooting in low light conditions can introduce noise into your images. In this section, I’ll explain how to minimize noise through techniques like long exposure photography, noise reduction in post-processing, and selecting the appropriate ISO settings. By mastering noise reduction, you’ll be able to produce cleaner and sharper night images.
How do I perfect white balance in my night photography?
White balance can significantly impact the mood and overall look of your night photographs. In this section, I’ll discuss the importance of adjusting white balance for different lighting situations encountered at night. You’ll learn how to achieve accurate and pleasing colors in your night images.
How can I explore urban nightscapes through my photography?
Cities come alive at night, offering unique opportunities for captivating night photography. In this section, I’ll provide tips and techniques to capture the beauty of urban landscapes after dark. From capturing city lights to photographing architectural marvels, you’ll discover how to create stunning nightscapes.
How can I embrace low light conditions in my photography?
Low light conditions can result in challenging but atmospheric photographs. In this section, I’ll explore how to embrace low light and use it to your advantage. I’ll share techniques for capturing vibrant colors, working with available light sources, and using creative compositions to capture compelling images in the dark.
How can I find inspiration for my night photography?
Sometimes, finding inspiration for night photography can be a challenge. In this section, I’ll provide ideas and suggestions to spark your creativity. Whether you want to photograph the night sky, experiment with light trails, or seek unique night scenes, you’ll find inspiration and tips to expand your creative vision.
How can I troubleshoot common issues in night photography?
Night photography can present unique challenges and issues. In this section, I’ll address common problems such as camera shake, focusing in low light, and dealing with harsh lighting conditions. You’ll learn how to overcome these hurdles and produce outstanding night images.
What joys can I experience through night photography?
Night photography offers a world of possibilities and creative opportunities. In this section, I’ll celebrate the joys of night photography and share moments of wonder and beauty that await you. You’ll gain a deeper appreciation for the magic of capturing stunning images in the dark.
What is the conclusion for this article on night photography?
In conclusion, night photography can be both challenging and rewarding. With the tips and techniques shared in this article, you’ll be well-equipped to explore the world of after-dark photography and capture stunning images. So grab your camera, embrace the night, and start your journey into the captivating realm of night photography.
Whether you’re capturing the stars, painting with light, or exploring the beauty of urban landscapes at night, there’s always something new and exciting to discover.
By following the tips and techniques outlined in this article, you can take your night photography skills to the next level and produce stunning images. Remember to always be prepared with the right equipment, adjust your camera settings for low light conditions, and experiment with different compositions and techniques.
With practice, patience, and a bit of creativity, you can capture breathtaking images of the night sky and the world around you. So go out there, embrace the darkness, and let your passion for night photography guide you towards new and exciting adventures.