Did you know that cinemagraphs, a form of mesmerizing imagery that combines static images with subtle motion elements, have taken the digital world by storm? These visually captivating creations have gained immense popularity in recent years, captivating audiences across various industries and platforms. With their ability to tell compelling stories and evoke emotions, cinemagraphs have become an essential tool for marketers, photographers, and content creators alike.
In this article, we will explore the top 10 cinemagraph techniques that will take your artistry to new heights in 2024. From mastering seamless loops to incorporating realistic motion blur, we will delve into the intricacies of cinemagraph production and provide you with the tips, tricks, and inspiration you need to create stunning cinemagraphs that will leave your audience in awe.
Key Takeaways:
- Discover the top 10 cinemagraph techniques that will elevate your artistry in 2024.
- Learn how to create seamless loops and maintain consistency in your cinemagraphs.
- Explore the use of motion blur, multiple exposures, selective color, and particle effects in cinemagraph production.
- Master depth of field, 3D imaging, and virtual reality integration for immersive cinemagraph experiences.
- Unlock the creative potential of combining cinemagraphs with live-action footage and pushing the boundaries of experimental techniques.
What is Cinemagraph Photography?

Cinemagraph photography is an innovative and captivating visual medium that combines the elements of photography and motion graphics. It brings static images to life by seamlessly integrating subtle and repeating movements into a still photograph, creating a mesmerizing and immersive experience for viewers.
Definition and Concept of Cinemagraphs
A cinemagraph is a blend of static imagery and dynamic content, where a specific element within the photograph is isolated and looped in a continuous motion. This selective animation adds a touch of magic and intrigue to an otherwise ordinary image, transforming it into a unique and engaging work of art.
The key concept behind cinemagraphs is the deliberate contrast between motion and stillness, drawing attention to the subtle movements within the frame while maintaining the overall composition and essence of the photograph.
The Rise of Cinemagraphs in the Digital Age
In recent years, cinemagraphs have gained significant popularity among photographers, marketers, and social media enthusiasts. The dynamic and eye-catching nature of cinemagraphs has made them a powerful tool for storytelling, advertising, and visual communication in the digital era.
With the advent of social media platforms like Instagram and Facebook, cinemagraphs have found their place as a compelling and shareable form of content. Their ability to capture attention and evoke emotions has made them an effective strategy for brands and businesses looking to stand out in a crowded digital landscape.
Applications of Cinemagraphs in Various Industries
Cinemagraphs have found applications in a wide range of industries and creative fields. They are used for product promotion, digital advertising, fashion campaigns, editorial content, event coverage, and even fine art. The versatility and visual impact of cinemagraphs allow them to create unique and memorable experiences in various contexts.
For instance, in the fashion industry, cinemagraphs can showcase the movement and texture of fabrics, enhancing the visual appeal of clothing and accessories. In food and beverage marketing, cinemagraphs can emphasize the freshness and irresistible allure of a delicious dish or a refreshing drink. From travel and hospitality to automotive and technology, cinemagraphs have revolutionized the way brands engage with their audiences, offering immersive and cinematic experiences that leave a lasting impression.
Stay tuned for the following sections to delve deeper into the techniques and creative possibilities of cinemagraph photography.
1. Mastering the Loop: Creating Seamless Cinemagraphs

Cinemagraphs are captivating visual creations that blend static images with subtle, seamlessly looping motion. Mastering the art of creating seamless cinemagraphs requires a keen eye for detail, precision, and a thorough understanding of the key techniques involved. In this section, we will explore essential aspects of mastering the loop to ensure that your cinemagraphs are visually compelling and mesmerizing.
Identifying the Perfect Moment for Looping
One of the fundamental steps in creating a seamless cinemagraph is identifying the perfect moment to create a loop. This moment should exhibit repetitive motion that can be seamlessly looped without any jarring transitions. Look for elements within your scene that have continuous motion, such as flowing water, flickering flames, or swaying objects. By pinpointing these moments, you can capture the essence of motion that will form the basis of your cinemagraph’s loop.
Techniques for Smooth Transitions and Blending
Blending is a crucial technique in cinemagraph creation as it ensures a smooth transition between the still and moving elements of your composition. To achieve smooth transitions, select software or apps that offer precise control over fade-in and fade-out effects. By gradually blending the static and moving parts of your image, you can create a seamless transition that enhances the illusion of perpetual motion.
Transitions can also be carefully managed through strategic positioning of elements within your cinemagraph. Consider how objects enter and exit the frame, ensuring that their movements align with the desired loop. By anticipating these transitions and adjusting the composition accordingly, you can maintain the visual continuity and fluidity of your cinemagraph.
Tips for Maintaining Consistency in Cinemagraph Loops
Maintaining consistency in cinemagraph loops is essential for creating a visually pleasing and immersive experience. Here are some tips to help you achieve consistent loops:
- Ensure that the length of your loop is appropriate for the subject matter and the intended effect. Experiment with different loop durations to find the optimal balance.
- Pay attention to the speed of motion within your cinemagraph. Too fast or too slow motion can disrupt the loop’s fluidity. Adjust the speed as needed to maintain a smooth and consistent loop.
- Take advantage of software tools and apps that offer timeline-based editing capabilities, allowing you to fine-tune the timing and duration of your cinemagraph’s loop.
- Regularly review your cinemagraphs during the editing process to identify any inconsistencies or visual glitches. Address these issues promptly to ensure a seamless final result.
By applying these techniques and tips, you can elevate the quality of your cinemagraph loops and create visually stunning and captivating cinemagraphs that engage viewers and leave a lasting impression.
2. Incorporating Motion Blur for Realistic Effects

In the world of cinemagraph photography, incorporating motion blur can add a sense of realism and dynamic movement to your creations. By intentionally blurring certain elements while keeping others sharp, you can create captivating visuals that mesmerize your audience.
Let’s explore the fundamentals of motion blur and its impact on cinemagraphs, along with techniques to adjust camera settings and post-processing methods to enhance this effect.
Understanding Motion Blur and Its Impact on Cinemagraphs
Motion blur refers to the streaking or blurring of moving objects in an image, resulting from their motion during the exposure. This effect can convey a sense of movement, energy, and action, making cinemagraphs more engaging and visually appealing. By incorporating motion blur strategically, you can bring your cinemagraphs to life and create a dynamic narrative.
Adjusting Shutter Speed and Camera Settings for Motion Blur
To capture motion blur effectively, you need to adjust your camera settings, particularly the shutter speed. A slower shutter speed allows more time for the sensor to capture the movement, resulting in increased blur.
Experiment with different shutter speeds to achieve the desired level of motion blur for your cinemagraph. Additionally, consider using a tripod or stabilizing equipment to maintain sharpness in the rest of the frame while isolating the blur to specific elements.
Post-Processing Techniques for Enhancing Motion Blur
Once you have captured your cinemagraph with motion blur, you can further enhance and refine the effect during the post-processing stage. Software tools like Adobe Photoshop or After Effects provide various techniques to manipulate and intensify motion blur. These techniques include brush blending, layer masking, and applying motion blur filters selectively. Through careful post-processing, you can create more pronounced and realistic motion effects in your cinemagraphs.
| Pros | Cons |
|---|---|
|
|
3. Combining Multiple Exposures for Dynamic Cinemagraphs

Combining multiple exposures is a powerful technique that adds depth and dynamism to your cinemagraphs. By blending different exposures, you can create stunning visuals that capture the viewer’s attention and tell a captivating story. In this section, we will explore the process of planning, capturing, and post-processing multiple exposures to achieve impressive results.
Planning and Capturing Multiple Exposures
To begin, carefully consider the scene and the desired effect you want to achieve with your cinemagraph. Determine the range of exposures needed to capture the details and dynamic range of the subject. This can be achieved by adjusting the aperture, shutter speed, and ISO settings of your camera.
When capturing the multiple exposures, it is essential to maintain consistent framing and alignment between shots. Use a tripod to ensure stability and reduce any unwanted movement. Take multiple shots with different exposures, varying the settings to cover the full range of highlights and shadows in the scene.
Aligning and Blending Exposures in Post-Production
Once you have captured the necessary exposures, it’s time to align and blend them in post-production. Use photo editing software like Adobe Photoshop or specialized HDR software to align the images and adjust their exposure levels.
Layer the images on top of each other and carefully mask out the parts you want to keep from each exposure. This process allows you to selectively blend the highlights, shadows, and mid-tones, creating a visually stunning and well-balanced cinemagraph.
Creative Applications of Multiple Exposure Cinemagraphs
The ability to combine multiple exposures opens up endless creative possibilities for your cinemagraphs. Here are some inspiring ideas to consider:
- Create a dynamic sunset scene with vibrant colors and silhouettes by blending exposures of the sky and foreground.
- Highlight the motion of flowing water by combining exposures with different shutter speeds, capturing both smooth and frozen moments.
- Add depth and dimension to portraits or still life subjects by blending exposures with varying focus points.
- Experiment with light painting techniques by blending exposures of different light sources in a dark environment.
By exploring different creative applications, you can take your cinemagraphs to the next level and captivate your audience with visually stunning and engaging content.
Now that you have learned how to combine multiple exposures for dynamic cinemagraphs, it’s time to experiment and let your creativity soar. The possibilities are endless, and by mastering this technique, you can create truly mesmerizing cinemagraphs that captivate and inspire.
4. Experimenting with Selective Color and Desaturation

To elevate your cinemagraph storytelling, you can experiment with selective color and desaturation techniques. These creative approaches allow you to emphasize certain elements in your cinemagraphs while creating a visually striking contrast between color and monochrome.
The Impact of Color on Cinemagraph Storytelling
Color plays a crucial role in communicating emotions and setting the mood in a cinemagraph. By selectively manipulating the color saturation, you can draw the viewer’s attention to specific details or amplify the narrative impact of your cinemagraphs. The strategic use of color can evoke feelings, create focal points, and guide the viewer’s gaze within the frame.
Techniques for Selective Color and Desaturation
There are various techniques you can employ to achieve selective color and desaturation effects in your cinemagraphs. Here are a few popular methods:
- Masking: Use masking tools in your editing software to isolate the areas where you want to retain or eliminate color. This allows you to create a powerful visual contrast.
- Gradient Maps: Apply gradient maps to assign different hues and saturation levels to specific areas of your cinemagraph. This technique can create dramatic and artistic effects.
- Color Balance Adjustments: Fine-tune the overall color balance of your cinemagraph to achieve the desired mood and aesthetic. By adjusting the levels of red, blue, and green, you can craft a compelling visual narrative.
Experiment with these techniques and explore your creativity to find unique ways to incorporate selective color and desaturation into your cinemagraphs.
Striking the Right Balance Between Color and Monochrome
While applying selective color and desaturation, it is crucial to strike the right balance between color and monochrome elements in your cinemagraph. Keep in mind that the color and monochrome areas should complement each other and contribute to the overall narrative. Avoid overwhelming the viewer with excessive color or losing the impact of the monochrome elements.
By effectively utilizing selective color and desaturation, you can create visually captivating cinemagraphs that engage viewers and tell compelling stories.
5. Incorporating Particle Effects and Simulations

In the realm of cinemagraph photography, the use of particle effects and simulations adds a captivating and dynamic element to the visual storytelling. By incorporating particle systems and simulations, photographers can create realistic and mesmerizing effects that engage viewers in a whole new way.
Understanding Particle Systems and Simulations
Particle systems are algorithms that simulate the behavior and movement of individual particles. These particles can represent objects such as dust, smoke, sparks, or even abstract elements like stars or bubbles. By defining various parameters such as velocity, lifespan, size, and color, photographers can manipulate particle systems to achieve specific visual effects.
Creating Realistic Particle Effects for Cinemagraphs
To create realistic particle effects, photographers can utilize specialized software programs that offer particle system functionality. These tools provide a range of customizable parameters, allowing users to precisely control the appearance, movement, and behavior of particles. By experimenting with different settings and configurations, photographers can achieve stunning visual effects that enhance the overall impact of their cinemagraphs.
Integrating Particle Effects into Cinemagraph Scenes
Integrating particle effects into cinemagraph scenes requires careful planning and execution. Photographers need to consider the artistic intent and desired narrative of the cinemagraph and select particle effects that complement the story or theme. By seamlessly blending the particles into the scene, photographers can create a cohesive and immersive visual experience that captivates viewers.
6. Mastering Depth of Field and Focus Stacking

In the realm of cinemagraph composition, understanding and utilizing depth of field and focus stacking techniques can significantly enhance the visual impact of your creations. These techniques allow you to control the sharpness and blur of different elements within your cinemagraph, creating a sense of depth and visual interest that captivates viewers.
The Role of Depth of Field in Cinemagraph Composition
Depth of field refers to the area in a photograph or video that appears in focus. By manipulating the depth of field in a cinemagraph, you can draw attention to specific subjects or areas, while blurring others to create a sense of depth and visual hierarchy.
To achieve selective focus and control over depth of field in your cinemagraphs, you can make use of wide apertures (smaller f-numbers) to create a shallow depth of field, emphasizing your subject against a blurred background. Conversely, a smaller aperture (larger f-numbers) can increase the depth of field, keeping more elements in focus throughout the frame.
Focus Stacking Techniques for Extended Depth of Field
Focus stacking is a powerful technique used in both photography and cinemagraph creation to achieve an extended depth of field. It involves capturing multiple images or video frames at different focus distances and blending them together in post-production.
By merging the in-focus areas from multiple frames, focus stacking allows you to create cinemagraphs with a considerably larger depth of field than what is achievable with a single shot. This technique is particularly useful when you want to maintain sharpness throughout the scene, even when elements are at varying distances from the camera.
Combining Focus Stacking with Cinemagraph Animation
Another way to elevate your cinemagraphs is by combining focus stacking with creative animation techniques. By carefully aligning and blending the focus-stacked frames, you can introduce subtle changes in focus within different parts of the cinemagraph, adding to the visual intrigue and storytelling.
For example, you can create a cinemagraph where the focus gradually shifts from the foreground to the background or vice versa, guiding the viewer’s attention and creating a dynamic visual experience. By strategically incorporating focus stacking into your cinemagraph animations, you can take your creations to new heights of artistic expression.
| Benefits of Depth of Field and Focus Stacking in Cinemagraphs | Examples |
|---|---|
| Enhances visual depth and dimension | Example 1 |
| Directs viewer’s attention to specific subjects or areas | Example 2 |
| Creates a sense of visual hierarchy | Example 3 |
By mastering depth of field and focus stacking techniques, you can unleash your creativity and bring your cinemagraphs to life with mesmerizing depth and visual impact.
7. Exploring 3D and Stereoscopic Cinemagraphs

In the realm of cinemagraph photography, the possibilities go beyond the boundaries of the two-dimensional. Stepping into the captivating world of 3D and stereoscopic cinemagraphs opens up a whole new dimension of visual storytelling and immersive experiences. By embracing advancements in technology and pushing the boundaries of creativity, photographers can transport their audience into dynamic and mesmerizing scenes.
Understanding 3D and Stereoscopic Imaging
When it comes to 3D cinemagraphs, depth perception is key. By capturing scenes from different angles or using multiple cameras, photographers can create a sense of depth and realism in their cinemagraphs. This added dimension enhances the immersive nature of the visuals, making them even more engaging for viewers.
Stereoscopic imaging takes the concept of 3D a step further by presenting separate images to the viewer’s left and right eyes. This technique stimulates the brain to perceive depth, giving the cinemagraph a lifelike quality and creating a truly captivating experience.
Utilizing 3D and stereoscopic imaging in cinemagraphs allows photographers to bring their creations to life, going beyond static imagery and immersing the audience in a world where the boundaries between reality and fiction blur.
Capturing and Processing 3D Cinemagraphs
To capture stunning 3D cinemagraphs, photographers can employ various techniques. These may include using stereoscopic cameras or employing a process called stereophotogrammetry, which involves capturing multiple images and stitching them together to create a 3D representation of the scene.
Processing 3D cinemagraphs involves carefully aligning and blending the multiple images to ensure a seamless and coherent visual experience. This step requires specialized software and technical skills to achieve optimal results.
Displaying and Viewing 3D Cinemagraphs
To fully appreciate the depth and immersive qualities of 3D cinemagraphs, the viewer needs the appropriate display technology. Various methods can be used to showcase these cinemagraphs, including stereoscopic displays, virtual reality headsets, or even holographic displays.
When viewed with the right equipment, 3D cinemagraphs offer a truly immersive experience, transporting the viewer into a world where motion and depth intertwine.
8. Incorporating Cinemagraphs into Virtual and Augmented Reality

The Role of Cinemagraphs in VR and AR Experiences
Cinemagraphs have quickly become a popular medium in the world of virtual and augmented reality (VR/AR). Their unique blend of static images and subtle, looping animations brings a mesmerizing sense of life and movement to immersive environments. Cinemagraphs enhance the overall realism and immersion of VR/AR experiences by adding dynamic elements that capture viewers’ attention and engage their senses.
In VR, cinemagraphs can be used to create captivating backgrounds or ambient scenes that breathe life into virtual worlds. They can transform static environments into vibrant and dynamic spaces, creating a more immersive and realistic simulation for users. Whether it’s the flickering of candlelight or the gentle movement of leaves in the wind, cinemagraphs add an extra layer of depth and believability to the virtual experience.
In AR, cinemagraphs can be seamlessly integrated into the real world through mobile devices or smart glasses, overlaying animated elements onto the user’s surroundings. This integration allows for creative storytelling and interactive experiences that blend the virtual and real worlds. Cinemagraphs in AR can range from subtle animations that enhance the visual appeal of a product to more elaborate narratives that merge digital content with real-life environments.
Techniques for Integrating Cinemagraphs into VR/AR Environments
Integrating cinemagraphs effectively into VR/AR environments requires careful consideration of the technical and aesthetic aspects of the experience. Here are some techniques to ensure a seamless integration:
- Optimize file formats and sizes: Choose file formats and resolutions that strike a balance between visual quality and performance. Compressing cinemagraphs without sacrificing visual fidelity is crucial for smooth playback in VR/AR.
- Consider looping duration: Since cinemagraphs loop continuously, it’s important to determine an appropriate duration that aligns with the overall experience. A loop that is too short or too long can disrupt the immersion or distract users.
- Align cinemagraphs with the narrative: Cinemagraphs should enhance the narrative or visual storytelling of the VR/AR experience. Consider the context and purpose of each cinemagraph to ensure it aligns with the intended message or atmosphere.
- Position cinemagraphs strategically: Place cinemagraphs in areas that draw attention without overwhelming the user. Consider the user’s gaze direction and movement to create a natural integration within the virtual or augmented world.
Best Practices for Optimizing Cinemagraphs for VR/AR
To ensure optimal performance and visual impact, follow these best practices when creating cinemagraphs for VR/AR:
- Keep the cinemagraph animations subtle: Avoid overly complex or distracting animations that can detract from the overall VR/AR experience. Subtle and seamless cinemagraph animations often work best in maintaining the user’s focus and immersion.
- Maintain consistency in visual style: A cohesive and consistent visual style across all cinemagraphs helps create a unified and immersive VR/AR experience. Ensure the color palettes and aesthetic choices align with the overall design and theme.
- Test across different devices and platforms: VR/AR experiences can vary across different devices and platforms. Test the cinemagraphs on various devices to ensure compatibility, visual fidelity, and performance.
- Optimize for performance: VR/AR experiences require efficient use of system resources. Optimize cinemagraphs by reducing file size, utilizing GPU acceleration, and optimizing render settings to ensure smooth playback and minimal impact on overall performance.
By incorporating cinemagraphs into VR/AR environments and following these best practices, creators can elevate the immersive and engaging qualities of their virtual and augmented reality experiences.
9. Combining Cinemagraphs with Live-Action Footage
Incorporating live-action footage into cinemagraphs is an exciting way to enhance visual storytelling and create captivating, dynamic experiences for viewers. By seamlessly blending photography and video elements, you can elevate the impact of your cinemagraphs and bring them to life with a new level of realism.
Planning and Capturing Live-Action Footage for Cinemagraphs
When planning to combine cinemagraphs with live-action footage, it’s crucial to consider the narrative and creative direction you want to achieve. Think about how the cinemagraph and the live-action footage will interact and complement each other to convey a cohesive visual story.
During the shooting process, ensure that the lighting, composition, and camera settings are consistent between the cinemagraph and the live-action footage. This will help in seamlessly integrating the two elements later during post-production.
Compositing and Integrating Cinemagraphs into Live-Action Scenes
In the post-production stage, compositing is the key to successfully combining cinemagraphs with live-action footage. Use video editing software like Adobe Premiere Pro or Final Cut Pro to import both the live-action footage and the cinemagraph.
To integrate the cinemagraph, overlay it onto the live-action footage and adjust the timing and positioning of the cinemagraph elements to align with the desired moments in the video. Use opacity and masking tools to blend the cinemagraph seamlessly into the scene, ensuring smooth transitions between the live-action footage and the animated elements.
Creative Applications of Cinemagraphs in Filmmaking
The combination of cinemagraphs and live-action footage opens up a world of creative possibilities in filmmaking. Here are a few examples of how you can leverage this technique:
- Highlighting specific details or elements within a larger scene, drawing attention to important visual cues or objects.
- Creating surreal or magical moments by animating specific elements within an otherwise static live-action environment.
- Enhancing emotional impact by adding subtle and nuanced movement to key moments in the film.
By integrating cinemagraphs into live-action footage, filmmakers can add an extra layer of visual interest and storytelling to their projects, allowing for unique and captivating cinematic experiences.
10. Pushing the Boundaries: Experimental Cinemagraph Techniques
Unleash your creativity and take your cinemagraph artistry to the next level with these experimental techniques. By pushing the boundaries of traditional cinemagraphs, you can create unique and captivating visual experiences that leave a lasting impression on your audience.
Exploring Unconventional Cinemagraph Styles and Approaches
Don’t be afraid to think outside the box and explore unconventional styles and approaches when creating cinemagraphs. Experiment with different subject matters, lighting techniques, and compositions to break free from the traditional norms. Let your imagination run wild and discover new ways to capture and convey moments frozen in time.
Combining Cinemagraphs with Other Art Forms and Media
Mixing cinemagraphs with other art forms and media can result in truly groundbreaking creations. Consider integrating cinemagraphs with illustrations, paintings, or even sculptures to add depth and dimension to your artwork. The fusion of different artistic elements can ignite new perspectives and evoke powerful emotions in your audience.
Embracing Creativity and Innovation in Cinemagraph Production
Innovation is the key to pushing the boundaries of cinemagraph production. Embrace new technologies, software, and tools that enable you to experiment and realize your artistic vision. Stay informed about the latest trends in the industry and constantly seek inspiration from other artists and creators. Remember, the only limit to your cinemagraphs is your imagination.
| Benefits of Experimental Cinemagraph Techniques | Examples |
|---|---|
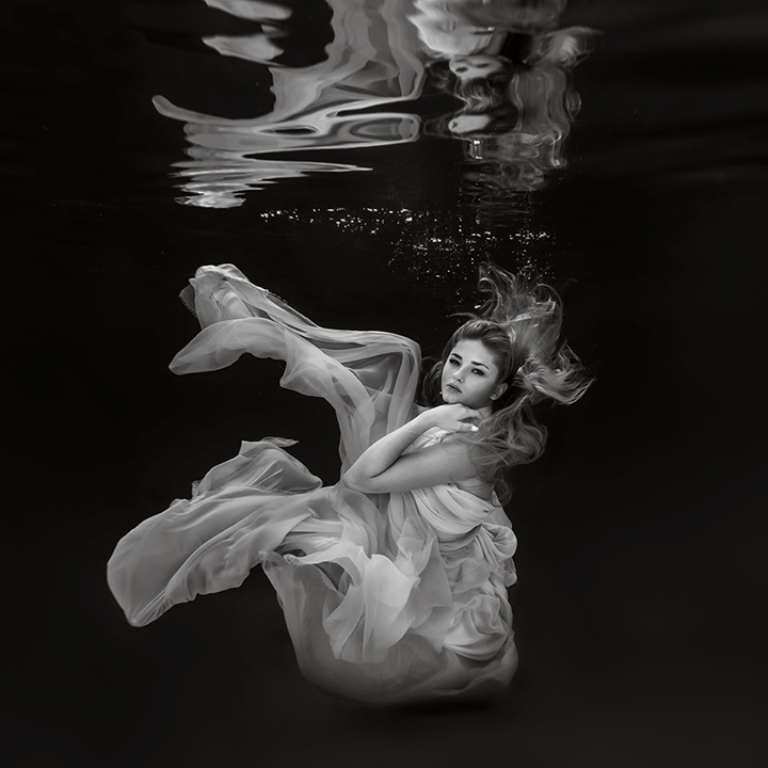
| Enhanced visual impact | An ethereal cinemagraph featuring a dancer surrounded by floating petals |
| Increased storytelling possibilities | A cinemagraph that combines live-action footage and hand-drawn animations for a whimsical narrative |
| Unique and memorable brand representation | A fashion brand showcasing their latest collection through cinemagraphs integrated with stop-motion animation |
| Artistic expression | A surreal cinemagraph incorporating dreamlike elements and surreal landscapes |
Experimenting with unconventional cinemagraph techniques not only provides you with the opportunity to stand out as an artist but also opens doors to new creative possibilities. Embrace the challenge, explore innovative approaches, and create cinemagraphs that leave a lasting impact on your viewers.
Essential Tools and Software for Cinemagraph Creation
In order to create stunning cinemagraphs, you’ll need the right tools and software to bring your vision to life. From camera equipment to post-processing software, here are some essential resources that every cinemagraph creator should have:
Recommended Hardware and Camera Equipment
When it comes to capturing high-quality cinemagraphs, having the right hardware and camera equipment is crucial. Here are some recommendations:
- A DSLR or Mirrorless Camera: Choose a camera with manual control settings and the ability to shoot in RAW format for optimal image quality.
- Sturdy Tripod: A stable tripod is essential for capturing the still elements of your cinemagraph while allowing for smooth camera movement.
- Remote Shutter Release: This tool helps eliminate camera shake and ensures precise timing when capturing your cinemagraph.
Popular Software and Apps for Cinemagraph Production
Once you’ve captured your footage, you’ll need reliable software and apps to edit and create your cinemagraphs. Here are some popular choices:
- Adobe Photoshop: This industry-standard software offers powerful editing tools and layer-based composition for precise cinemagraph creation.
- Flixel Cinemagraph Pro: A dedicated cinemagraph editing software that simplifies the process with intuitive controls and integrated social media sharing.
- Plotagraph: This app allows you to animate still images and create cinemagraph-like effects directly from your smartphone.
Emerging Technologies and Tools for Cinemagraph Creators
As the field of cinemagraph creation continues to evolve, new technologies and tools emerge to enhance the creative process. Here are some emerging resources to explore:
- Artificial Intelligence (AI) Tools: AI-powered software can automate certain aspects of cinemagraph creation, such as masking and motion tracking.
- Virtual Reality (VR) and Augmented Reality (AR) Integration: With the rise of VR and AR technologies, incorporating cinemagraphs into immersive experiences offers new creative opportunities.
- 360-Degree Cameras: These specialized cameras capture a full spherical view, allowing for unique and immersive cinemagraph experiences.
Conclusion
Cinemagraphs have become an increasingly popular form of visual storytelling, captivating viewers with their blend of static images and subtle, seamless motion. As we look ahead to 2024, there are several key techniques and trends that can elevate your cinemagraph artistry to the next level.
First and foremost, mastering the art of looping is essential. Creating seamless and continuous motion within your cinemagraphs ensures a mesmerizing viewing experience. Pay close attention to identifying the perfect moment for looping, and employ techniques for smooth transitions and blending to maintain consistency throughout your work.
Incorporating motion blur can add a realistic and dynamic touch to your cinemagraphs. Understanding the impact of motion blur and adjusting your camera settings accordingly can make a significant difference in the overall effect. Additionally, employing post-processing techniques to enhance motion blur can further refine your cinemagraphs.
Another technique to explore is combining multiple exposures. By carefully planning and capturing multiple exposures, you can create cinemagraphs with a dynamic range of light and detail. In post-production, aligning and blending these exposures allows for unique and visually striking results that will captivate your audience.
These are just a few of the techniques and trends that can help elevate your cinemagraph artistry in 2024. Experiment with selective color and desaturation, incorporate particle effects, master depth of field and focus stacking, explore 3D and stereoscopic cinemagraphs, and embrace experimental approaches. By pushing the boundaries of cinemagraph creation, you can truly stand out in this vibrant and evolving medium.